Irene (my X100V) Captured Those Shadows!

Always got her with me! No, not my wife … I meant “Irene” my X100V, coz she fits in my jacket pocket (my wife doesn’t - barely … ;-)! I just follow Irene around and capture the images that beckoned her: Fleeting moments in time where the black paint cutout of shadows revealed the objects creating them. Only to disappear forever a few moments later … Enjoy!

Contre Jour City Park Fence, captured by Irene, my X100V with its 23mm F/2 II @F/8, 1/80 sec, ISO 1000

The best camera is the one that’s with you” - well quoted by Chase Jarvis, creative storyteller (that he was referring to the ubiquitous iPhone don’t matter, the Fuji X100V is ‘nearly’ as compact as the average “smart” phone ;-)

Point is, all that ‘spensive, fancy photography kit ain’t gonna help you, if you don’t lug it around with you everywhere, every day, all day (and all night for good measure). All that gear sitting on it’s shelf at home: y’all just gonna miss all those special, once-in-a-lifetime photo moments which usually tend to happen when you’re least expecting them …

So, advise youse to sell all your gear & get y’selves an X100V. It’s liberating, I kid you not! This is a real camera specialising on photography, not a phone which by the way also snaps some photos now and then (next to a dozen other things: Jack of all trades, master of none …). The X100V’s just on the limit of what I’d consider a compact, always with you camera and the images you’ll take with it’ll blow you over! Look at the image above with the sun backlighting a fence in our city park: finest gradations of grey tones in the highlights and shadows with just barely enough details slipping into inky blacks. The shafts of sunlight connecting the fence with its shadow - amazing! See the tables turned in the image below: Stark contrast in the highlights, but the dark shadows gradated with a lovely tonality:

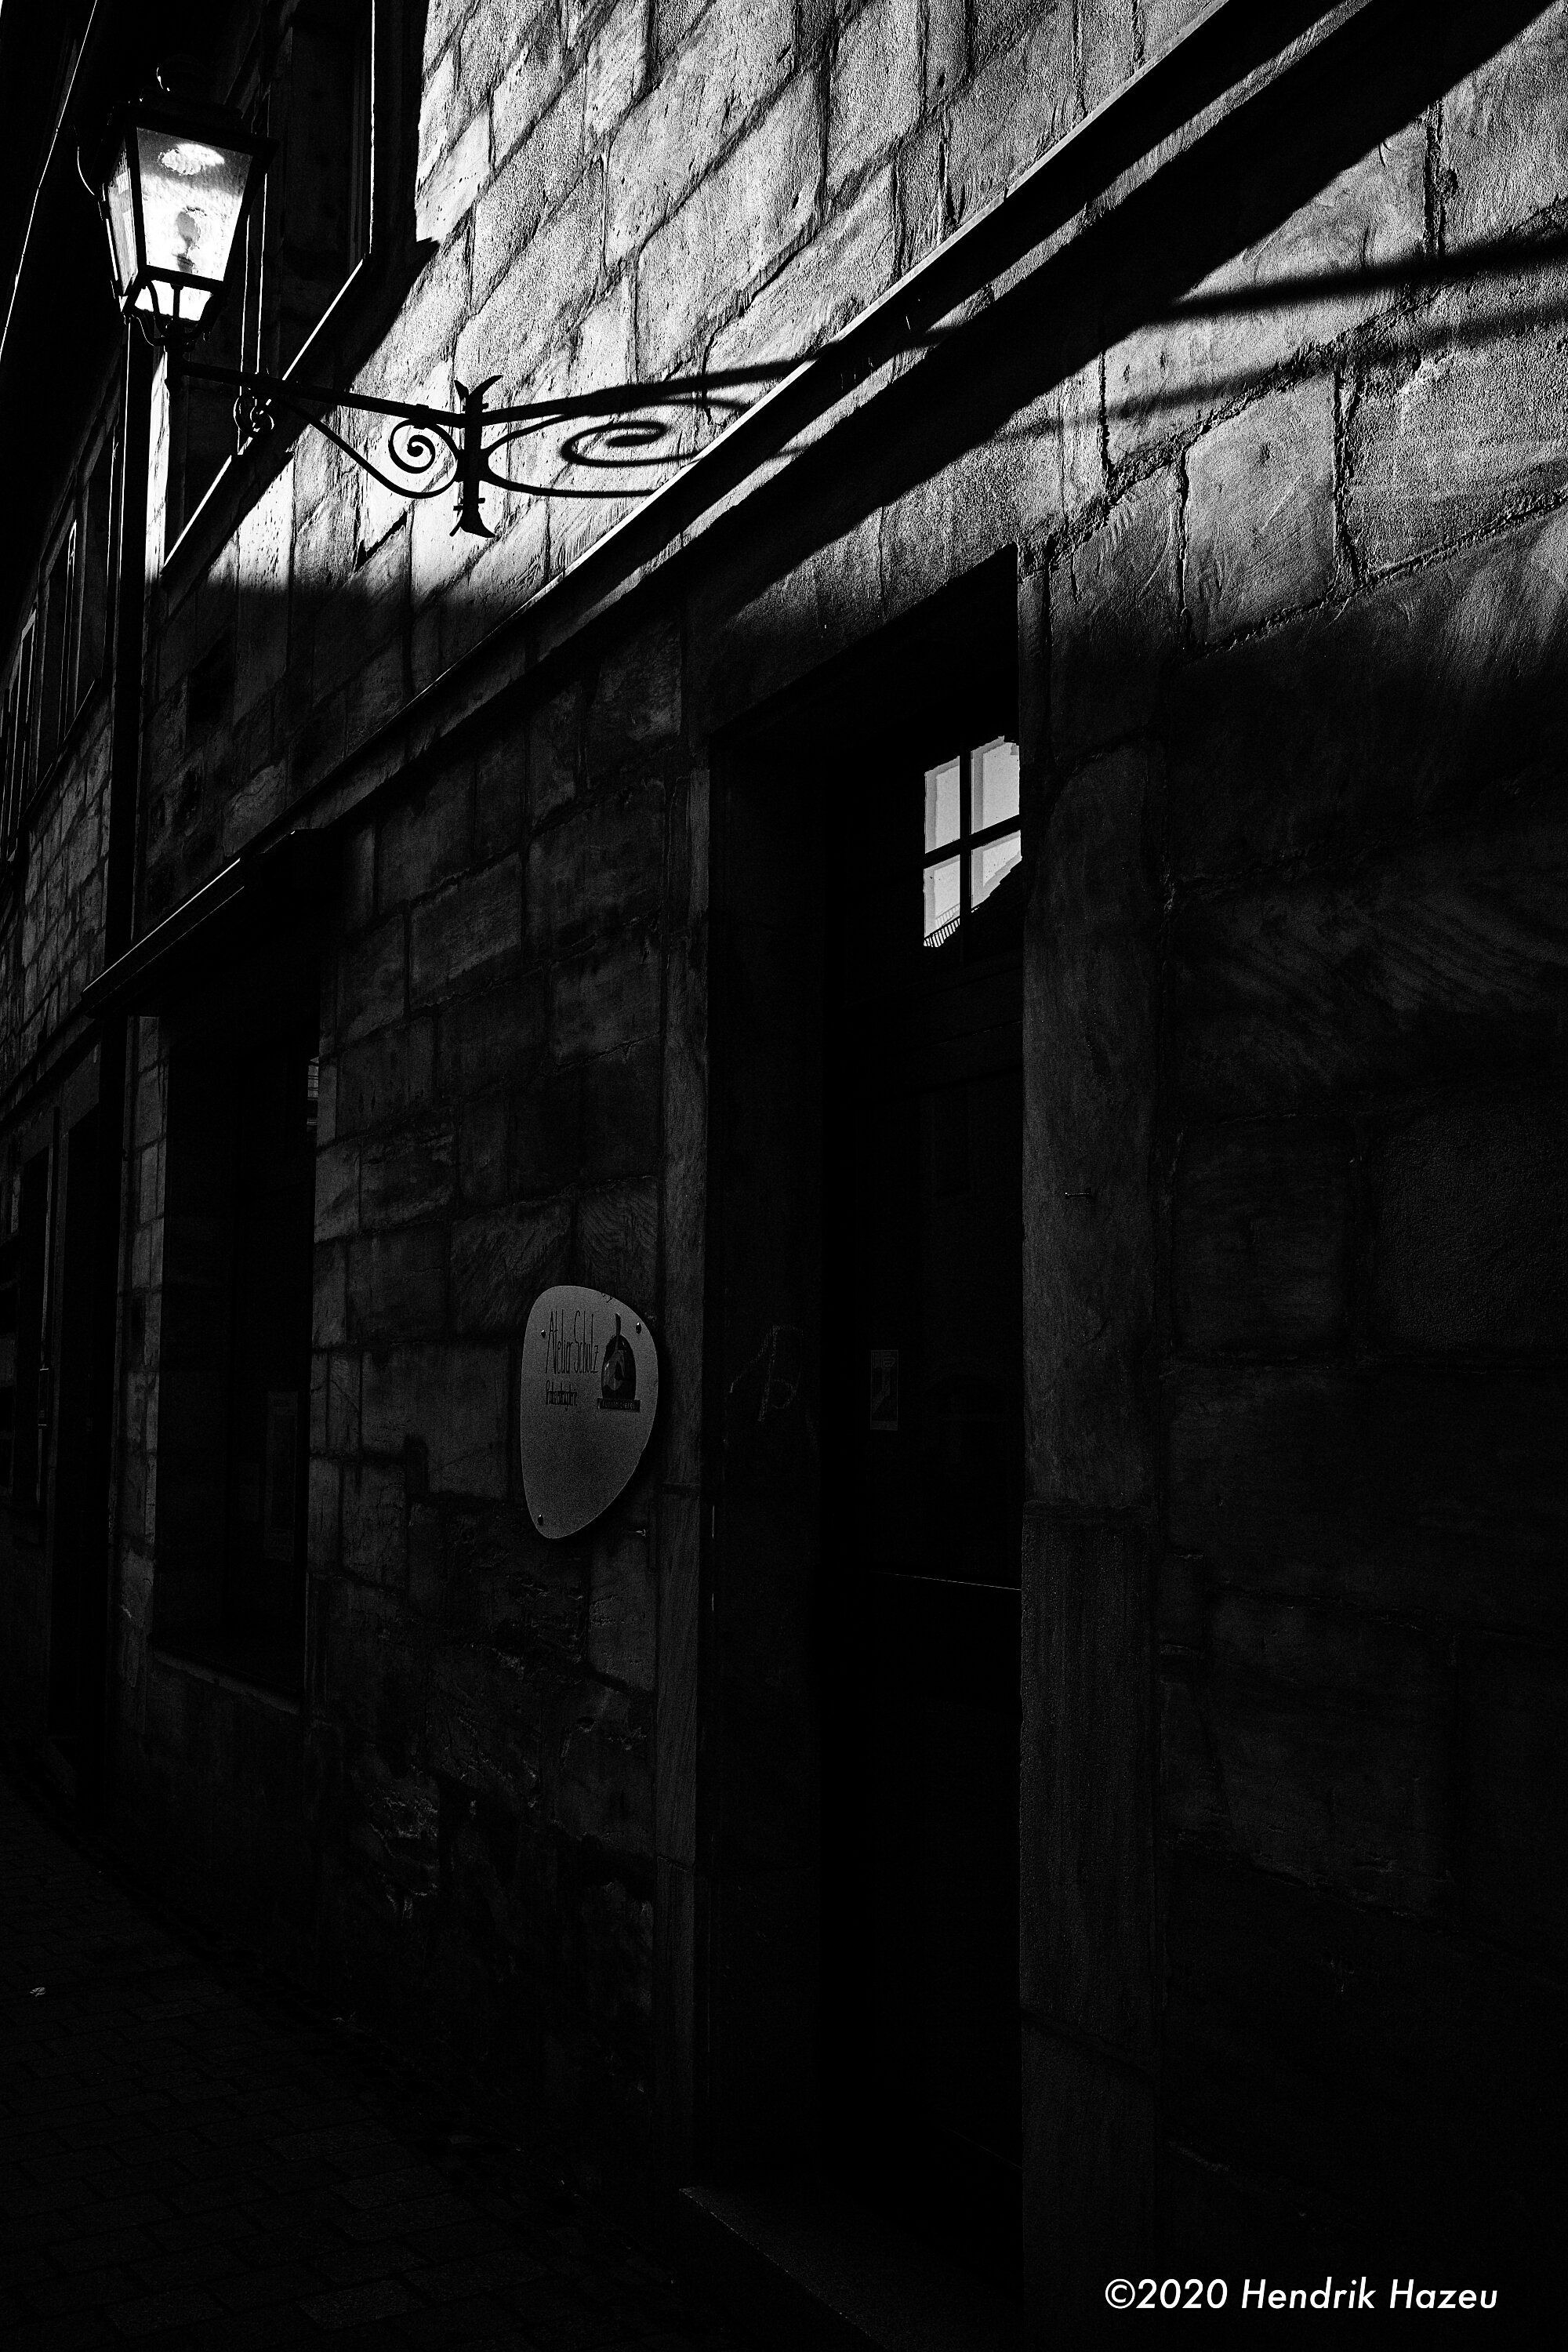
Dark Alley with Sunlit Lamp, taken by Irene, my X100V with its 23mm F/2 II @F/8, 1/180 sec, ISO 320, -1.7 EV

Dark Alley with Sunlit Lamp, taken by Irene, my X100V with its 23mm F/2 II @F/8, 1/180 sec, ISO 320, -1.7 EV

Achieved this by exposing for the shadows (with -1 2/3 EV exposure compensation) & allowing the highlights to burn out a wee bit! The X100V’s hybrid viewfinder is a great help here: I use the optical mode (optical viewfinder OVF) for street photography, coz it allows me to see the scene unfold in real time, w/o blackout at the moment of capture and the environment of the image visible outside the frame-lines. For static motifs (architecture, landscapes) I prefer the electronic mode (electronic viewfinder EVF), as this allows me to see the image in black & white and in the right exposure, contrast & tonality - WYSISWYG (what you see is what you get). This was also important for the below image “Shadow Bike”. I wanted to show that the bike’s shadow is just a virtual, short-lived rendering of the real thing by allowing enough details of the wall’s texture to shine thru the shadows, giving them the appropriate transparent, evanescent character …

Shadow Bike, seen by Irene, my X100V with TCL-X100 II 33mm F/2 @F/5.6, 1/640 sec, ISO 320

Of course you can take such images with any camera, even with an iPhone … But it’s the right combination of size / weight / image quality and a viewfinder which helps you to have the camera always with you, to identify and capture such image opportunities in the first place. I believe Fuji’s X100V is probably the best suited solution out there: Fantastic image quality in a package just small enough to always have with you, with a highly flexible and intuitive viewfinder system. No, the X100V don’t replace an extensive kit offering a wide range of specialised applications, it will more importantly complement your kit by enabling you to capture amazing images any time and place. Surprising and unexpected images, which will be close to your heart, because you weren’t planning them!

I hope y’all got some inspiration here to now go out and take some creative and amazing images, giving you enjoyment & satisfaction - especially important in these difficult times. Let me know your thoughts in the comments section below please, or leave me a note on my about page, take care and stay safe - wish y’all a great weekend, best regards,

Hendrik

If you like you can support me by sending me a small donation via PayPal.me/hendriximages ! Helps me run this site & keeps the information coming, many thanks in advance!

Happy New Year 2021!

Thought I’d wait with this until all of the world had moved into 2021 (yeah I got readers from all timezones ;-) … So here’s to wishing a very happy, healthy and prosperous New Year 2021 to y’all! And may your private, professional and especially photographic endeavours succeed and bring you joy & satisfaction!

All the best and good hope for the new year 2021, captured by my X100V “Irene” @F/2.8, 1/40 sec, ISO 4000!

The image above is of a lovely crystal X-mas tree ornament I received (just in time ;-) on Christmas Eve from my daughter (who’s studying abroad). It was a real shame we couldn’t meet F2F for Christmas due to Covid “no-fly” travel & quarantine restrictions, but at least I got a special present from her with so many positive vibes that I thought it’d be a great motif for my Happy New Year’s post! So, a big Thank You to Helena! :-)

I sincerely hope for all of you that the new year brings good health, happiness and luck to you and your loved ones and that we together can look forward with good hope to a great 2021, enjoy!

I’d also like to use this opportunity to thank all of you who visited my blog last year for your interest, support, helpful comments, interesting questions and constructive critique. This has helped me to advance my photography and given me the opportunity to “meet” (at least virtually) many new people with a shared passion!

Thanks again for that and all the best wishes to you all with my warmest regards, please stay safe,

Hendrik

If you like you can support me by sending me a small donation via PayPal.me/hendriximages ! Helps me run this site & keeps the information coming, many thanks in advance!
Work the Image, with the XF 35mm F2!

They used to say to first get y‘self a “normal” (i.e. 50mm full frame equiv.) prime lens when starting out in photography. Gonna help you “learn how to see”, they maintained. True, however since the advent of the ubiquitous “kit” zoom lenses the new tune is that zooms can do that even better: Giving you a wide angle, and tele, and everything in between on top of that “boring normal focal length”. Way more opportunities, man! Sounds tempting, but dude I tell ya that’s total BS. Marketing hogwash. You’re getting snowed, right there! Please read on to find out why sticking on to that single, “boring” normal focal length is gonna kick start improving your photographic vision!

Façade mosaic: XF 35mm F/2 R WR on X-Pro3 @F/8, 1/420 sec, ISO 320

Before continuing I’d like to sincerely apologise to my faithful readers for not having posted anything here for so long, at least those of youse who ain’t ditched me yet 😉 (jeezus it’s been close to 4 months now …): Combination of increased day job workload (partly incl. weekends), moving house to a new apartment, taking care of my wife needing surgery on her shoulder, and of course the ongoing Corona situation (yeah, everybody’s kinda using “The Corona Excuse®” nowadays for anything screwing up & needing excusing, so why not me too?)

Ok, back on-topic: You’re an inexperienced photographer starting out or a pro in a rut, not able to find photogenic motif’s? I kid you not, that “normal” prime lens’ll shamelessly expose your photographic deficiencies and by that will force you to learn and adapt. Coz images created with a “normal” focal length approx. the same length as the image diagonal (that’s around 43mm diagonal / 50mm focal length on full frame and 28mm diagonal / 33mm focal length on APS-C) tend to offer a bit of a bland perspective, barring any optical effects. Point is, with a ‘normal’ lens the visual impact of your image needs to come from your seeing & composition skills, not from your lens. Where a wide angle would allow you to get closer to your image, creating a more exciting ‘steeper‘ perspective or a Tele would push you back from your subject, compressing your image, the normal lens does none of that. It just faithfully depicts the scene before you. Nothing more, nothing less! So it’s a lens which is gonna teach you how to see (photographically), provided you bring up the patience to work your images and learn & grow with it, that is!

Waterflow: XF 35mm F/2 R WR on X-Pro3 @F/16, 1/30 sec, ISO 160

In today’s blog for example I’ll only use Fuji’s diminutive but excellent XF 35mm F/2 R WR (53mm FF equiv.) to demonstrate the “work the image” concept: Look at the first image in this post, it lives solely off the geometric shapes and contrast of interacting façades and their textures. No fancy “effect” or anything! Because I could not “zoom” I had to walk forwards and back, bend up and down, try different framings … In the end I shot around 10 images until I’d nailed it! That’s what I mean with “work the image”: A process of moving around, using different perspectives and angles, and experimenting with the frame to drive your learning of photographic composition. Check out this great book Magnum Contact Sheets. There you’ll see that even the world’s greatest photographers don’t just walk around and magically capture iconic images with a single press on the shutter button. No they also work the image, often needing 20-30 attempts until all elements of the composition are perfect!

Digital cameras further support the learning process by giving immediate feedback via their LCD screen, speeding up the image composition optimization (In my analogue days long ago it sometimes took a week until I could see the results after getting my exposed images back from the lab …)

The value of immediate feedback: In the above image of a city fountain I at first used a higher shutter speed of 1/250th of a second. Didn’t like it when I reviewed the image on my X-Pro3’s fold out screen (well, the folding out of that screen somewhat nullifies the “immediate” aspect, but that’s a different story …). Then with a 1/30th of a second slower shutter speed the water comes out slightly blurred and creates those beautiful mosaic shaped transparent reflections! Again the normal lens’s quiet character w/o fancy effects pushes its owner to experiment more, in this case with different shutter speed / aperture combinations or with varying points of view and perspectives

Back alley: XF 35mm F/2 R WR on X-Pro3 @F/8, 1/80 sec, ISO 320

So you see, it pays to be patient and refrain from immediately buying a tele- and/or wide angle lens to give your images added oomph! Then you’re just relying on optical effects to make your images more interesting. Limiting yourself to one lens for a while will allow you to get to know that specific lens’s character and rendering. By experimenting with various distances in combination with the image framing you’ll learn to get the best composition which suits your motif. Of course if you already have many other lenses, just throw them away and your images will improve dramatically (just kidding, folks 😉). Alternatively ask your wife to lock ‘em up (she’ll love that!) or just don’t always take all your lenses with you every time (your back will thank you for that!). I found the above image by moving around until I’d found the optimal position from which the various lines in the frame (roof edges, drain pipe, shadows, wall, …) were in balance. It gave me a similar satisfaction as when pieces of a complex puzzle click into place to finally reveal the picture!

Of course you can work the image with any lens, but from my point of view the “normal” lens is best suited for this because it’s mild angle of view offers the most possibilities. With a wide angle your range of movement is limited because small changes of position dramatically change the image content: Take a step back and you’ll see lots of unwanted elements entering the frame, step forward and lose key parts of your image. On the other hand a tele lens is less sensitive to your position, limiting the potential benefit of moving around.

I hope y’all enjoyed today’s post, advocating return to a more simple, uncluttered approach to your photography - ideally focusing more on using your “normal” lens as the basis for your entire system and for learning to see (again) to optimize your composition!

Please leave me note in the comments below or on my ‘about’ page if you have any remarks, suggestions wishes or ideas!

Wish you a relaxing Sunday evening and a good start to the holiday season, please stay safe & healthy!

Kindest regards,

Hendrik

If you like you can support me by sending me a small donation via PayPal.me/hendriximages ! Helps me run this site & keeps the information coming, many thanks in advance!

The XF 16-55mm F/2.8 - Born to be ... a Brick!

I did it. Finally. A couple months ago I bought the “Brick” (again). “Brick”? That’s the short name for Fuji’s Pro F/2.8 24-85mm full frame equivalent zoom. Fuji calls it the XF16-55mm F/2.8 R LM WR. Now why would having a zoom be such a big deal? Coz I’m a prime guy. Don’t like zooms. Then I went out and got one regardless … And it has taught me what a “Love/Hate Relationship” is. Please read on to find out more!

City park contre-jour, taken with X-H1 and XF 16-55mm F/2.8 R WR @16mm, F/8, 1/100 sec, ISO 400

Look at the above contre-jour picture taken in our city park during the early morning! I tell ya, images taken with this lens are tack sharp. Always! So, full disclosure here: I had it already back in 2017, on my X-T2 (my main camera at that time). But then sold it (despite loving its image quality), coz I found that it was not suited to low light photography in the golden hours at the beginning and end of the day having a max. aperture of “only” F/2.8. That’s 2 (two whole!) stops below my F/1.4 primes, without any OIS (optical image stabilisation) to compensate the loss of light. That’s why it’s a Brick! Or have you ever seen a Brick with image stabilisation? No? Well, I ain’t either. So, it’s a Brick. Now why would I buy a “Brick” again?

For sure y’all have heard of the “definition of insanity”: Doing the same thing over and over again and getting the same result, but expecting a different one. This quote is often attributed to Albert Einstein (also to Ben Franklin and Mark Twain …). But it was neither from those nor from Einstein, coz that quote would contradict the laws of thermal dynamics & chaos theory. Those teach us that it is actually highly unlikely that you get the same result when doing something the same way over & over … Go try shuffling a deck of cards in the same way several times and see how often you can get the same card to come out on top. See? It ain’t gonna happen, not if you’re not a halfway good magician … ;-) Actually this “definition of insanity” first appeared in 1981 in a document published by Narcotics Anonymous: A guide book to help narcotics overcome their addiction by persuading its members that it’s a futile exercise to continue using narcotic drugs and expecting to be able to stop on their own

So, maybe I ain’t “insane” after all - I got a real reason for buying “The Brick” again! Coz of what’s meanwhile changed: Fuji gave us the X-H1, first time sporting IBIS (In Body Image Stabilisation). So, on the X-H1 the “Brick” is stripped of its main reason for being a Brick: With the X-H1’s IBIS I can now use the Brick in a “Brick-less” environment (twilight, IBIS+F/2.8 @1/8-1/15 sec, comparable to no IBIS+F/1.4@ 1/30-1/60 sec). So, the X-H1 has given the Brick the chance to taste life as if it wouldn’t have been a Brick! Below another image I liked because of the subtle gradations from pure white to deep black:

White & black cars, seen with XF 16-55mm F/2.8 on X-H1 @55mm, F/8, 1/400 sec, ISO 200, -1 EV

Ok back to topic now. What are the pro’s & con’s of the XF 16-55mm F/2.8 and why do I have a “Love/Hate Relationship” with this lens?

Here the Pro’s (the “Love” relationship):

  • Fantastic image quality, comparable to Fuji’s F/2 primes already from max. aperture F/2.8 onwards. Only at its longest focal length you can find some very slight edge softness (no issue)!

  • Max. F/2.8 aperture over the whole zoom range & aperture values marked on aperture ring

  • Versatility: The 16 - 55mm range (substantial wide angle to portrait telephoto) is perfect for all-round photography, esp. when you don’t wanna change lenses (wedding, travel, dust, rain, …)

  • Flexibility: Y’all can switch from overview to detailed images at the turn of the zoom ring!

  • Excellent, extremely robust build (mainly metal, only front tube of high quality plastic): No play, no wobble. Rings have just the right resistance. Zoom doesn’t extend with lens pointing down

  • Build quality: Well centred, no dust / smears on inner lens surfaces (as some Fuji lenses have)

  • Completely weather & dust resistant (special seals to prevent sucking dust in when zooming)

  • Good close focus of 0.4m (0.16x magnification): You can take a frame filling image of your hand!

This is the kind of image I love this lens for: No need to change lenses when documenting festivities (weddings, anniversaries, parties, …) & superior, prime-like image quality from F/2.8 onwards:

Anniversary “selfie”, captured on X-T2 with XF 16-55mm F/2.8 @23mm, F/5.6, 1/30 sec, ISO 1600, flash -0.3 EV

The above image of me & my pretty wife at our anniversary was taken using the zoom’s moderate wide-angle setting of 23mm by hand-holding the camera with Brick and flash in “selfie” mode - quite a stunt to hold that rig steady at arm’s length weighing nearly 2kg (4.4 lbs) ! ;-)

And now the Con’s (the “Hate” relationship):

  • Even if the X-H1 takes care of image stabilization it’s still a Brick, as in big and heavy: Strap that Brick onto your X-H1 and you’re holding nearly 1.4kg (that’s 3lbs!) in hand! All the time …

  • This lens has no image stabilisation! Means it is less useful on non stabilised bodies (X-Pro2/3, XT-3, …), limiting how far you can venture into the golden twilight hours w/o a tripod. That’s why it was born to be a Brick! w/o image stabilisation the max. aperture of F/2.8 is just not enough …

  • It has a seriously intimidating effect on people (with a 77mm filterø it’s in full frame territory!). Try pull this thing out and point it at someone - people dive for cover and the person you wanted to take an intimate portrait of best case gives you a somewhat irritated smile & feels sorry for you!

  • I’ve a tendency to use this zoom mostly at its focal length extremes (i.e. at 16 and 55mm), less in between. This negates its flexibility a bit as I could just as well run around with 2 cameras with the XF 16mm/1.4 and YF 56mm/1.2 bolted on them!

  • I got the feeling that images taken with this multi-element zoom (17 elements in 12 groups!) somehow come out a bit “flat” (lacking the 3D pop that my primes exhibit). Just a feeling …

Edit 2020/7/20:

On the last item above, regarding tendency of multi-element zooms to maybe generate a bit “flat” image rendering … I really dunno, but if I look at below image taken with my XF 23mm F/2 in very similar circumstances as the first image of this post, I do kinda get the feeling it has more “3D pop”. Maybe I’m just imagining stuff … So, y’all please decide & let me know your comments! Take a look:

City park contre-jour, X-Pro2 with XF 23mm F/2 @F/8, 1/40 sec, ISO 400 - amazing “3D-pop”!

As you can see I’ve got quite an ambiguous relationship with this lens … In fact I don’t really use it that often, despite it’s fantastic image quality! It mostly only gets used when I absolutely need the flexibility of a zoom and/or need to work in dusty / wet environments, where changing lenses would freak me out (remember? I’d risk getting PTSD if any dust’d get onto my sensor!). The main issue I got with this lens is it’s (full frame-esque) size & weight. Holding those 1.4kg (3lbs) continuously in one hand gets annoying rather soon. If I compare this to taking along my 2 camera / 2 lens kit (2 X-Pro2’s with 23 & 50mm F/2’s attached in my compact Think Tank Hubba Hubba Hiney), I get a much more balanced kit for only 200g extra and only around 15% larger bag size. In this setup I have one camera in hand, that weighs only around half (!) of my X-H1 + Brick combo: It’s just way easier to hold only 800g in your hand over longer periods of time! Meanwhile the other camera/lens is in the bag nicely distributing the weight

Anyway, see below image I did with the 16-55 zoom. Especially architecture photography works well with zooms as you have to adjust the angle of view all the time & need in-between settings to match the image to the frame:

Town house, on X-H1 with XF 16-55 F/2.8 @17mm, F/5.6, 1/550 sec, ISO 400

Well, that’s about it with my short review of Fuji’s XF 16-55mm F/2.8 R LM WR lens: It’s undeniably THE best mid range zoom I’ve ever had (and I’ve seen ‘em all), at a very fair price of just over a grand. IF you can live with its weight & size handicap, that is. Ideally you’d combine it with an image stabilised body (X-H1 or X-T4) to enable low light hands free photography, despite the F/2.8 max. aperture

Please head over to Philip Sutton: He’s an avid user of this lens & you can learn a lot from his beautiful people photography! Actually he triggered me to buy the 16-55 again, thanks Philip!

As always, if you have any questions or would like to leave me some comments (constructive critique is always welcomed ;-)) please do so in the comments section below or send me a message via my “about” page. I will answer every one, I promise!

Wish y’all a good week & hope you stay safe & healthy,

best regards

Hendrik

If you like you can support me by sending me a small donation via PayPal.me/hendriximages ! Helps me run this site & keeps the information coming, many thanks in advance!

X-H1? Get One! ... If You Still Can

Don’t argue, just get one. Period. Fuji X-H1’s THE best interchangeable-lens APS-C camera Fuji made. Ever. And there ain’t many left, coz production stopped end of last year. But some shops still got some X-H1’s costing less than a grand, new! Y’all never gonna get such a bargain ever again! And I ain’t just talkin’, I got 3 of ‘em, crazy huh? Yeah, but the internet’s saying the X-H1’s no good … nonsense, I tell ya. Total BS, all that what you’re reading online, please take a look to find out why!

Two of a kind, captured on X-H1 with XF 90mm F/2 R WR @F/5.6, 1/240, ISO 400, developed in Capture 1

Thing is, at the moment Fuji’s going down the wrong rabbit hole. Their new X-T4 may be a fantastic featured camera but that damn selfie/vlogger fold-out LCD screen don’t cut it for me. And their new “pure photography” X-Pro3? That one’s got 2 new, useless features in one go: A crippled OVF and a “hidden” LCD screen. Jeezus … Done. I’m just NOT interested. Don’t get me wrong, I’m definitively not in a position to tell Fuji what to do (and I ain’t got no illusions whatsoever that they’d listen to me anyway …) hell, for all I know they may have found out that their future success & prosperity lies in offering:

  • Selfie/vlogger style video-centric cameras to the masses, and

  • Leica-esque fashion editions to a niche hipster crowd, made financially viable by compromising more mundane features only important to real photographers …

No problem. Go for it Fuji, but then you’re gonna lose me as a loyal customer - not that they’d care about that anyway, mind you … but they’d probably also lose a whole bunch of honest, serious still photographers in the process and that could cause a dent in their business! It would be such a shame, though. Creating no-nonsense cameras for serious photographers, with focus on still imagery was always Fuji’s heritage (“DNA” in business-speak). For me they were until today the only brand left, which was creating real photography tools, combining modern digital imaging technology with a traditional ‘exposure triangle’ user interface (aperture, shutter, ISO) based on tangible mechanical dials with always visible settings (even if the camera’s turned off). All the others have turned to churning out “computers”, where key settings pertaining to creating the photographic image are buried in multi-layered menus. Sometimes it seems that for some modern cameras taking the picture is more of a kinda afterthought, like “and oh, by the way it does take a picture too, at least now and then …”

After only just having launched their latest 2 flagship cameras (X-Pro3 & X-T4), which IMO both have veered off from the traditional path by inconsistent featuring, it’s gonna be at least 2-3 years until they come up with the next gen. X-Pro4 or X-T5, or whatever. Then it’s gonna be anybody’s guess whether they’ll wake up & come to their collective senses in using that opportunity to reconnect to their heritage, or just hatch out another crazy un-photographic “innovation”. So, y’all now got enough time to cure yourselves of GAS (Gear Acquisition Syndrome) and just enjoy the good stuff Fuji’s blessed us with up to now (eg. X-Pro2, X-T3, X-H1 and X100V … ;-) and you don’t need to worry about your kit becoming obsolete any time soon!

All this seems kinda like a Déjà vu of my experience a long times ago with Nikon: I was running around in the 80’s as a journalist with 2 battered, fully mechanical Nikon F2’s and 4-5 primes. Man I loved that gear (weather resistant? Hell no, it was bomb-resistant! ;-) And then Nikon went along and launched the electronic F3. Oh man, was I pissed - in that era I sure didn’t trust no electronics (like many of my pro photographer buddies of the time, btw!) - they always seemed to run out of juice when you had no fresh button battery cells on you, forcing you to “limp” along with the 1/60 sec emergency mechanical shutter speed. For me Nikon just went downhill after the mighty F2 …

Façade in shadows, X-H1 with XF 90mm F/2 R WR @F/8, 1/600 sec, ISO 400, developed in Capture 1

Meanwhile, since the end of the last century the advent of mass produced highly integrated digital circuitry, including microprocessor based functions, has made electronic cameras extremely reliable (no moving parts, no wear & less production faults due to fully automated wafer fab’s). Way more reliable than their mechanical counterparts of yesteryear ever had been, in fact. You just gotta make sure you always got enough charged batteries on you (and that there’s somewhere an electrical outlet at hand to charge ‘em). An electronic camera w/o batteries = dead in the water! No juice, no pictures (and your fancy camera just became an expensive paperweight! ;-)

Back to the X-H1: For me it is simply the best interchangeable-lens APS-C camera in the market. Like my Nikon F2 was so long ago, the X-H1 seems to be the last of a golden age, with all that coming after her being under par in my opinion. Now, what is it specifically that puts the X-H1 above the others? For me it’s the balanced combination of 5 (not more, not less) key features:

  1. Best visual interface: Fluid 0.75x mag. EVF with high eye-point & lightning fast tilt-able LCD
    - ideal for flexible, fast subject viewing & composition, making image pre-visualization a joy!

  2. Perfectly positioned ‘feather touch‘ shutter with zero time-lag & traditional exposure dials
    - allowing me to capture the decisive moment instantaneously, discretely and intuitively!

  3. Slightly increased body size (vs. other APS-C cameras), with a larger highly ergonomic grip
    - perfectly fits my medium sized hands & the pronounced grip makes for totally safe holding!

  4. IBIS (in-body-image-stabilization), allows 3-4 stops slower shutter speed than 1/focal length
    - perfect for street & scenic twilight photography w/o tripod, when the light is most beautiful!

  5. Super robust, weather resistant body (25% thicker chassis compared to eg. X-T3)
    - tight, ‘bomb-proof’ perception, infusing confidence & liberating me to focus on my images!

Feels like I’ve been re-united with my legendary Nikon F2 (albeit with a modern heart!). See below image: I could capture the moment immediately when I saw it, framing it by quickly folding out the LCD screen (lifting the camera up to my eye would’ve ruined the spontaneity & lost the image), and having IBIS on board meant I could still capture a sharp image despite the bad lighting conditions!

Evening coffee, seen with X-H1 and XF 35mm F/1.4 R @F/2, 1/45 sec, ISO 800, developed in Capture 1

At first when I got my first X-H1 begin 2019 I thought it’s not really a pretty camera. But meanwhile I’ve come to appreciate its rugged, no-nonsense design & grown to love its intuitive & fast operation. And the sound of the mechanical shutter. Just gorgeous. It’s heaven! (Yeah, I know that don’t get you better images, but it sure makes the process of creating ‘em more enjoyable & satisfying!) In fact, I’ve grown so happy with my X-H1 that I now got 3 of ‘em (yes, three! The last 2 acquired recently for less than 800 bucks a pop - my favorite dealer seems to have built a secret stash of them somewhere when Fuji’d announced the phasing out of the X-H1 ;-)

OK OK, I hear some of youse out there sounding off about what kinda nutcase I must be buying ‘borderline obsolete’ cameras, where production’s already stopped … Let me me say this to that: I don’t give a rat’s ass! I don’t need the latest and the greatest, I need a photographer’s camera. A no-nonsense image taking tool w/o aspirational, fancy (video-centric) features that get in my way. That’s the X-H1 right there for me. You don’t like my advice? No problem, I’m not forcing you, it’s a free world after all. Do what you want, go somewhere else & be happy! Why having several of the same cameras? Think that’s an old habit from my analogue film days: I needed 2 cameras to allow me to use high & low sensitivity film in parallel to adjust to changing lighting conditions (and have a backup in case of some mechanical malfunction). In the digital age it’s more because I hate changing lenses to prevent dust entering the camera and ending up on the sensor. Those of youse know me know I’m kinda paranoid about that. The shrinks even got a name for it: “amathophobia”, derived from the greek words “amathos” = sand, and its diminutive form as dust & “phobos” = fear, i.e. “fear of dust” (and with me that psycho condition’s highly specialized: I just get it in relation to a camera sensor. Any other kind of dust, I couldn’t care … ;-)

So I keep 2 of my favorite primes, the XF 23mm F/1.4 and the XF 56mm F/1.2 like permanently glued to my X-H1’s. All fits in a compact Lowe Pro Inverse 200 AW belt pack weighing in at just about 3 kg (including spare batteries, cards, etc.). Not too bad!

Ok, I think that those of you patient enough to follow my ramblings up to here might fancy a small reward now! So, below I’ll share my preferred X-H1 function button allocations, optimized after many hours of trial & error playing around with the camera ;-). Note that the X-H1 has the highest number of customizable function buttons of all Fuji cameras (13), coz it’s got a D-Pad AND a touch screen LCD (both with 4 function slots)! This setup is also aligned with the setups of my X-Pro2’s and my X100V, allowing me to have an as much as possible standardized user interface across all my camera types (X-H. X-Pro, X100 and GFX):

See here the function button allocations more in detail:

  • Fn1: EXPOSURE COMPENSATION. toggles the exposure compensation via the front dial on/off

  • Fn2: FACE/EYE DETECTION SETTING. brings up face/eye detection menu (joystick to select)

  • Fn3: IS MODE. cycle IS (image stabilisation) mode from continuous to shooting only to off

  • Fn4: PLAYBACK. playback button on the right-hand side of the camera (like X-Pro2 & X100V)

  • Fn5: AF MODE. select AF-mode (SINGLE POINT > ZONE > WIDE/TRACKING > ALL)

  • Fn6: ELECTRONIC LEVEL. for quick check if camera’s level to prevent needing to crop in post

  • T-Fn1: SHUTTER TYPE. quick change of shutter type, eg. from electronic ES to mechanical MS

  • T-Fn2: ISO AUTO SETTING. quick change between 3 auto ISO settings (also via rear dial)

  • T-Fn3: D RANGE PRIORITY. don’t often need this but good to have

  • T-Fn4: NATURAL LIVE VIEW. I use ACROS-R film simulation, this is good to see the shadows

  • AE-L: AE LOCK ONLY. used to lock the auto exposure when needed

  • AF-ON: AF-ON. to activate back-button autofocus

  • R-DIAL: FOCUS CHECK. quick zoom in to check the focus

With these function button allocations I have an intuitive & fast user interface fully aligned with my way of making images. Please try it out & let me know if & how this works for you!

Summarizing, the X-H1 is IMO the best interchangeable lens APS-C camera Fuji ever made. It has no-nonsense ergonomics perfectly optimized for pro level still photography. The larger grip facilitates a cramp-free & safe holding even for longer photo sessions. The highly customisable intuitive user interface allows you to set the camera up so it gets outta your way when crafting your images. Last but not least its robust design will ensure you’ll always have a reliable photo companion with you for many years of photographic fun! Get one … If you still can, you won’t regret it!

Please be invited to join the discussion in the comments section below or leave me a PM on my about page, many thanks for visiting & supporting my blog. I hope y’all had an enjoyable read!

Take care & be safe!

Cheers

Hendrik

If you like you can support me by sending me a small donation via PayPal.me/hendriximages ! Helps me run this site & keeps the information coming, many thanks in advance!

Fuji ... Quo Vadis?

Today I’d like to share some thoughts and concerns on the direction Fuji, my camera brand of choice seems to be taking lately … Despite all the hype & dust kicked up over recently launched models I am absolutely NOT interested in 2 of the latest offerings (and consequently I will not “upgrade”. Ever. No sir). So, dear Fuji, in case you should one day happen to stumble on to my blog and read this, I hope you will appreciate my humble feedback and take note! For all others, please read on before you pull the trigger to maybe prevent being disappointed!

On the bike, captured by X-H1 with XF 56mm F/1.2 @F/8, 1/220 sec, ISO 200, developed in Capture 1

“Quo vadis?” is a classic Latin phrase meaning “Whither goest thou?” (or in contemporary English: “Where are you going?”). So, with this open letter I wanted to address precisely that question to Fuji … After trading in one of my X-H1 bodies around half a years ago to help finance a medium format GFX50R with a couple lenses, instead of getting one of Fuji’s brand new exchangeable lens bodies (X-Pro3, X-T4), I last week actually went out and got m’self another X-H1! Again (and it was a helluva bargain at 800 bucks too, if you bear in mind that one initially used to sell for more than twice as much!)

I mainly use my X-H1’s with my 23mm/1.4 and 56mm/1.2 lenses bolted on ‘em (as you might know I’m a paranoid about changing lenses … ;-). With these large aperture lenses coupled to the X-H1’s great in body image stabilisation feature, I can really enjoy my twilight & night photography w/o needing to lug a heavy tripod around … Now, there for sure gonna be some of youse out there sayin’ “Jeezus, how stupid can he be? With the fan-tas-tic X-T4 just launching as we speak, including image stabilisation and latest sensor and what not … WTF?” (remember Fuji saying some time ago the IBIS feature ain’t never gonna be possible in the more compact footprint of the X-T line?). With all the “ambassadors” & “influencers” parroting all over the net that the X-T4’s the next best thing after sliced bread, the very best of, THE one and only, yada, yada … Hey, that “hendriximages” guy must be totally nuts. Crazy. Must’ve just gone off the reservation by sticking to his antique X-Pro2’s and buying that miscarriage of an X-H1, despite all these shiny new “pure photography tools” (X-Pro3) and “Jack of all trades” (X-T4) being available … Might wanna go out and get some professional help right there, he should!

Yeah, well I actually use my X-H1’s. A lot. And I really like them, they’re very comfortable in hand & they got a great user interface. Sadly the internet don’t seem to agree - also the X-H1 seems to be a ‘www hate magnet’, just like the XF18 F/2 R is …

Town house triangle, seen by X-H1 with XF 23mm F/1.4 @F/8, 1/1300 sec, ISO 200, developed in Capture 1

Anywayz … For me just about the only thing Fuji did right with their latest new APS-C camera launches was the X100V. With a significantly improved lens, added weather resistance and a subtle, visible fold-out LCD, carefully evolving its design as to not lose the X100 line’s heritage, this one solved the main misgivings of the previous models & ticked all the boxes for me. For me it’s an absolute winner, finally delivering on the initial promise of a street photographer’s dream. I love my X100V and she’s always with me (especially when I’m not on a planned photo op, and then some!). Thanks God they didn’t put that crummy hidden LCD on there …

But the X-Pro3 or the X-T4? No. Those ain’t gonna be for me. Sorry Fuji, I’m just ain’t interested. Not at all!

So, if you’ve somehow managed to continue reading up to here w/o heading straight over to my comments section below to shoot me down in flames, please gimme a chance to explain! I’ve always had a soft spot in my heart for rangefinder style cameras, because of their optical viewfinder (OVF) allowing for an unobstructed, realistic view of the subject, including the world “outside the frame” (great for environmental, documentary & street photography). I use that OVF for composing around 30% of my images and its existence is one of my main reasons for being faithful to the Fuji brand (no other mirrorless camera maker has this feature …)

Now let’s start with the X-Pro3. I really can’t imagine what demon took possession of product management over at Fuji when they decided to cripple the X-Pro3’s OVF (Optical ViewFinder) by restricting it to only one magnification level (0.52x). The consequence of this renders the X-Pro3’s OVF completely unusable for me. Useless. Like totally! If they were doing this to save costs they might as well could’ve better gotten rid of the OVF all together. That would’ve saved ‘em even more cost and a lot of trouble too … So, why’s the X-Pro3’s OVF crippled? Well, it kinda only really works with the 23mm lens. With the the shorter focal length of the 18mm the frame lines are outside the viewfinder’s boundaries (Ok, seems nobody ‘cept me and a couple other crazies likes that 18mm lens anywayz …). And with the 35mm (THE documentary lens, the one you might use most often) the frame lines are so small & lost in the middle of the viewfinder you kinda need a microscope to see what’s going on in there. Hell the area outside the frame shows more than the actual picture you’re trying to frame (and btw you can just forget about the 56mm or anything beyond). On the other hand my X-Pro2’s OVF with variable magnification allows 3-4 lenses to live happily in it (18mm, 23mm, 35mm, and even the 56mm in a pinch). Whereas the X-Pro3’s crippled OVF only works with 1-2 lenses, the 23mm & the 35mm (kinda)

I probably could somehow learn to live with the other 2 “upgrades” of the X-Pro3: The missing D-pad and that weird “hidden” LCD (meaning you can’t even compensate the lost custom function slots due to the missing D-pad via touch screen gestures when the LCD is hidden). OK, OK I get it, y’all can’t do no “pure” or “serious” photography if the LCD’s not hidden … But IMO all that ain’t ever gonna justify the X-Pro3’s approx. 2 grand price point. No way. Note, you can still get a new X-Pro2 (w/o the crippled OVF & w/o that dorky “hidden” LCD gimmick) for half that price, and then you even get slightly better high ISO & shadows noise behaviour to boot. And I promise, you will not not notice any difference between the 26 and 24 MP sensors either (actually I even prefer the rendering of the X-Pro2’s / X-H1’s X-Trans III sensor over the X-Pro3’s one). So, it’s kinda a “no-brainer”, if you ask me! Take a look at the beautiful shades of white below:

White in white street, X-H1 with XF 56mm F/1.2 @F/8, 1/800 sec, ISO 400, developed in Capture 1

Ok, so what about the upcoming X-T4?. Feature-wize it’s quite amazing what Fuji has packed into a still very compact body for a reasonable price (approx. 150$ less than X-Pro3): The X-T4 includes all the goodies contemporary camera tech can offer, so it’s quite impressive from a business proposition point of view. The single reason why I ain’t gonna put down my money for this one is ergonomics (or better lack thereof …): The X-T4’s shutter button is placed at a larger distance rearwards vs. the grip, and w/o forward inclination compared to the X-H1, see below image:

x-t4 vs x-h1 shutter button position.png

So, pressing the shutter requires an awkward contortion of your index finger respective to your hand holding the grip. Furthermore for my (medium sized) hands the X-T line’s body size is too small for a camera with a central viewfinder (DSLR style) layout. My X-H1’s grip is more comfortable and due to the increased width of the camera the viewfinder is in a better position. These at the end were the reasons why I never really could get used to my X-T2, subsequently selling it and never ending up buying an X-T3 (compared to which the X-T4 is even worse, because its grip is protruding even more out from the front of the body)

A more critical issue for me is the X-T4’s new “multi-angle, reversible LCD screen”. While this may be great for the vlogger- & selfie crowd it is a downright hinderance to serious stills photography. Why? Firstly it takes far longer time to fold out the LCD 180° from the right all the way to the left and then rotating it upwards if you want to look down while shooting from waist level (ideal for street photography). It can’t be slanted up- or downwards while on the back of the camera! And when folded out the whole LCD screen is sticking out to the left side of the camera like a sore thumb, making handling the camera quite a fiddly & awkward affair compounded by the complicated manipulation of the LCD screen. On my X100V I can switch between viewfinder and using the LCD at waist level in a split second - I just quickly need to pull out the bottom of the LCD a few cm in one fluid movement to slant it and can immediately look down to enable unobtrusive shots in the streets, without having to lift the camera to my eye (do that & people will immediately notice you. forget any spontaneity right there …). Apart from this you might get worried that the X-T4’s LCD’s hinge could easily break off by leveraging the exposed LCD screen against the body, while moving around to get a good perspective. To be fair I haven’t yet been able to physically try an X-T4 out, but I know all about this problem coz I had such a folding / twisting LCD in Nikon & Panasonic point and shoots a long time ago & and it freaked the heck outta me …

Summarizing, while I commend Fuji for having the courage to try out new things, for me the development direction of Fuji’s 2 new top-of-the-line ‘Flagship’ cameras has taken a completely wrong turn. On the:

  • X-Pro3 by crippling precisely THE key feature inherent to a rangefinder style camera (the OVF!)

  • X-T4 by an awkwardly placed shutter button and a cumbersome 3-D articulating LCD screen needing a time consuming manipulation and with the risk of damage due it’s exposed position when in use

These user interface & ergonomics misgivings may just be my subjective perception, but for me they’re a major blocking point to purchasing these cameras because they are a hinderance to a fluent & unobtrusive photographic process. Furthermore in my point of view the other “improvements” of these new models are not a sufficient upgrade vs. my current cameras to justify the requested price premium

Fuji PLEASE get this right on your next generation cameras, then they most probably will become unbeatable photographic tools! One of Fuji’s core strengths is listening to its consumer base. If they want to continue getting my hard earned cash they will have to quit playing around and go back to focus on core usability and ergonomic aspects of their cameras for serious photographers! All this trying to create a one-size-fits-all concept which attempts to suit everybody (photographers, videographers, vloggers and selfie aspirants) - kinda “Jack of all trades, master of none” approach will require major compromises from everyone and satisfy no one (because the requirements and processes of all these applications are so different). For me there are 3 distinct target groups, for which Fuji would do better to create dedicated solutions for and focus in fulfilling their key needs:

  • Serious still photographers

  • Videographers & film makers

  • Vloggers & instagrammers / selfie aspirants

If Fuji don’t respect these user groups’ diverse requirements they for sure risk losing their consumer centric heritage and added value vs. other brands, risking to drive loyal customers to jump ship. However I do think that the first two groups can be combined by a using a separate dedicated (stills/video) menu system, like the X-T4 has. Only, at least PLEASE go back to the X-H1, X-T2/3 type articulating LCD screen! Fuji you listening?

Sun pavillon, observed by X-H1 with XF 23mmm F/1.4 @F/8, 1/100 sec, ISO 400, developed in Capture 1

I hope this has been helpful to solve your own personal dilemmas as to what to do. I strongly advise y’all to think it over very carefully before you trade in your X-Pro2’s or X-H1’s (or X-T3’s for that matter) for the new X-Pro3’s and/or X-T4’s. There’s no way back and you might regret it, so, maybe you get a chance to try them out thoroughly side-by-side (rental or borrow a demo kit from your AD), before deciding! For me they are in no way worth their price premium!

Please leave me any questions and/or remarks in the comment section below or on my “about” page, Have a great Sunday, stay heathy and be safe!

Thanks for your interest & support, cheers

Hendrik

If you like you can support me by sending me a small donation via PayPal.me/hendriximages ! Helps me run this site & keeps the information coming, many thanks in advance!

It's All Just a Matter of Perspective - XF18mm F/2 R

Wish y’all happy Easter, folks. Today I want to share some thoughts on another “oldie but goldie” Fuji lens, the unjustly unliked XF 18mm F/2 R. A somewhat difficult focal length (roughly comparing to a 28mm wide angle on full frame), but if you come to terms with it’s field of view you will be rewarded with amazing images displaying a wider natural perspective without distortion and that obvious (yawn) “wide angle” effect. Please take a look:

Look up & Go close! Looking up with X-Pro2 and XF 18mm F/2 R @F/16, 1/120 sec, ISO 200

The Fujinon XF 18mm F/2R lens is a compact “pancake” design & was the second of 3 original lenses Fuji launched back in March 2012 together with their first exchangeable-lens rangefinder-esque X-Pro1. Like the XF 35mm F/1.4 R it features an “old fashioned” All Lens Group (ALG) focussing system, meaning the lens barrel extends at closer focussing distances (see additional information here). Unjustly unliked? Search for this one on the net and it’s amazing how much hate & negativity this little lens gets. Completely unjustified IMO - maybe people don’t know how to use it properly and then blame their own incompetence on the lens … Whatever, with this lens you just need to adapt your approach to photography and then you will just love the results! Trick is to look for new, unusual viewpoints and … GO. CLOSER! Remember Robert Capa’s famous quote?: “If your images ain’t no good, you weren’t close enough!” Just check out the image above: had to look up nearly vertically & really suck up to that wall to get that dynamic perspective!

Compare this to a similar image on the right, shot with the slightly longer 23mm “normal wide angle” lens on my Fuji X100V (corresponds to a 35mm full frame equivalent field of view): I just don’t seem to like this image as much as the one above, what do you think? So, the XF 18mm is great if you want to do a bit more than “just” document something, but without making your images look distorted, or like they were taken just for the “wide angle effect”. Images from the XF 18mm (if used properly) have a distinct dynamic perspective to them!

X100V’s 23mm F/2 @F/8, 1/350 sec, ISO 320, -0.7 EV

Doorway in contre jour, captured on X-Pro2 with XF 18mm F/2 R @F/8, 1/800 sec, ISO 200

Now above image technically does not specifically require the slightly wider field of view of the XF 18mm. I could’ve just as well used my X100V on this but I would have had to take a few steps back to include the whole doorway and the wrought iron ornament into the frame. Again being able to come closer steeps up the perspective & creates a more dynamic image, but it’s only when you go even closer and tilt the camera upwards that you get a really interesting perspective, see below image! I tried the same with my X100V but its narrower field of view forced me to back up several steps, which meant the camera was less tilted upwards. At the end I didn’t take the shot on my X100V. coz it lacked the dynamics I was looking for! This perspective also better portrays the ornament and its shadow, creating several layers of diagonal lines, which I liked much more:

Doorway with wrought iron ornament, seen with X-Pro2 and XF 18mm F/2 R @F/8, 1/640 sec, ISO 200

So there you have it, if you want to create images with dynamic “pop” you might wanna give the XF 18mm a spin. I can highly recommend this little lens. Mind you, you’ll need to “learn” how to use this “prima donna” lens. But if you are persistent she will reward you with exciting images!

Hope y’all liked the post, please leave me your comments and any questions you may have in the comments section, or on. my “about” page. Wish youse a nice Easter weekend, take care & be safe

Yours,

Hendrik

If you like you can support me by sending me a small donation via PayPal.me/hendriximages ! Helps me run this site & keeps the information coming, many thanks in advance!
A Lens with Character, the XF 35mm F/1.4 R

With this post I wanted to share with y’all my love for the “oldest but goldest” of Fuji lenses: The XF 35mm F/1.4R. Despite all the great stuff which Fuji brought out after it, this first lens is the one which IMO has the most character, please read on to find out more & enjoy!

Chairs in the sun intertwined with their shadows, X-Pro2 with XF35mm F/1.4 @F/8, 1/420 sec, ISO 200

“Character” … so, whassat mean now? OK, I headed over to Merriam Webster, but they got like 10-15 meanings for it. So I guess I gotta be more specific! Basically the character of something or someone describes specific distinctive qualities and/or conspicuous traits which differentiate that individual from others and drive its personal behaviour and style. What differentiates Fuji’s XF 35mm F/1.4R lens from others is the way its rendering transitions from the sharp part of the image in the focus plane to the unsharp areas in the image to the front & the rear of the focus plane

On modern lenses with internal focussing only a few elements inside the lens are shifted to achieve focus. The advantage of this is that the lens can be more compact, its length does not change & nothing moves on the outside of the lens. However as the distances between the lens groups inside the lens change when adjusting focus, optical designers need to apply stronger correction to compensate aberrations. This (over)correction tends to generate harsher foreground bokeh and restless, more nervous (obvious) background bokeh. This can be observed in the “bokeh balls” having a defined circumference (“onion rings” in photography jargon). This occurs especially at closer focus distances and is exacerbated in case the lens employs additional aspherical lens elements to achieve that higher degree of correction. Older lens designs (to which I count Fuji’s XF35mm F/1.4R) use what Fuji calls “All-Lens-Group (ALG) Focussing”, meaning that distances between lens groups do not change. Therefore these can do with fewer aspherical elements (the XF35 mm F/1.4R has only 1 aspherical lens element):

“All-Lens-Group (ALG) Focussing” technology, courtesy of Fujifilm Corporation’s X-System Guide ©2019

“All-Lens-Group (ALG) Focussing” technology, courtesy of Fujifilm Corporation’s X-System Guide ©2019

Here the whole lens system is shifted to achieve focus, without changing the distance between the lens groups. While this tends to increase the size of the lens, reduce the focussing speed and results in the front lens barrel moving in an out of the lens body during focussing, the lens requires less correction and can deliver smoother bokeh: Case in point, Fuji’s newer XF 35mm F/2R WR lens requires 2 aspherical lens elements to achieve sufficient correction of aberrations, even it is one stop slower than the older, single aspherical lens element design of the XF 35mm F/1.4R. Please see below the beautiful, subtle rendering of out of focus areas, the blurred structures in them are much less apparent compared to internal focused lenses with several aspherical elements:

Spontaneous pic of my pretty wife, captured on X-Pro2 with XF 35mm F/1.4R @F/2, 1/2000 sec, ISO 200

Like for so many Fuji’s X100 line (it was the “S” for me) was the entry drug into a more spontaneous, carefree kind of photography, uninhibited by tons of heavy gear “ballast” and continuous choices on what lenses to take with you. “The best camera is the one you always have with you”, and the X100S played that role for me. However, while being in principle happy with its “standard” wide angle (35mm full frame equivalent) field of view I’ve always preferred the slightly tighter perspective of a “normal” (50mm full frame equivalent) lens. Soon I was a proud owner of Fuji’s exchangeable lens version of the X100S, the X-Pro1, together with the XF35mm F/1.4R. I don’t know what magic sauce they dipped this one into - the way this lens renders is just incredibly beautiful, especially at apertures of F/2.8 and larger, see also the image below:

Orchids contre jour, exposed with X-Pro2 with XF 35mm F/1.4R @F/2.8, 1/2700 sec, ISO 400, EV +1

I immediately loved this lens’s “normal” undistorted field of view, ideal for documentary type photography. Since then, “lured” by the image quality promise of Nikon’s new D850 I sold my Fuji kit and went thru a short phase of full frame photography. After a short honeymoon I ruefully returned to the Fuji fold, when I (re)discovered that full frame, even delivering amazing quality, again meant lugging a major piece of heavy kit around. Result: My photographic activity wound down, I just couldn’t be bothered & my camera often stayed at home. No camera, no images, please read also this story! I tell you, after this you learnt to appreciate the compactness of APS-C. A Fuji X100V and even an X-Pro2 with a compact XF 35mm are sufficiently small that you can always have them with you, resulting in spontaneous, lively images. See below an image of this sceptical little guy I met during a recent Sunday afternoon walk (yes, even I sometimes do cat photos …):

Little tiger in the sun, seen with X-Pro2 and XF 35mm F/1.4R @F/5.6, 1/200 sec, ISO 400

Here you can see it again, even at F/5.6 the background dissolves in a gentle blur without any disturbing artefacts, resulting in a 3 dimensional rendering of the the little tiger! Although I love the XF 35mm F/1.4R’s image quality the AF noise is quite loud (in this case quite helpful as it caught kitty’s attention 😉)

In case you enjoyed reading this article, I would like to welcome you at my website hendriximages.com for more information on my style of Black & White photography. Looking forward to seeing y’all there!

Please take care & stay healthy, OK?

Many thanks & cheers,

Hendrik

If you like you can support me by sending me a small donation via PayPal.me/hendriximages ! Helps me run this site & keeps the information coming, many thanks in advance!

PS: If you’re interested in inspirational photography please also be sure to head over to Fuji X Passion, they got loads of interesting articles with great images to enjoy & learn from!

All You Need is LoVe ... for the X100V!

V”, as in X100V and by the way it’s the 3rd letter in the word “LoVe”! Now it ain’t my intention to try explain what love is here, so let’s just head over to Merriam Webster (dictionary). They got a fitting definition I’d like to share with y’all: Love is … “a strong affection for another arising out of kinship or personal ties”. Another? Ok, so in this case it ain’t a person, but it’s the X100V! Please check out my user review, tips & recommended settings below after nearly 4 weeks of extensive use:

Twin lamps’ shadows, captured on Fuji X100F with 23mm F/2 @F/8, 1/350 sec, 160 ISO

See the picture above? Somehow I never seem to find that kind of images (or should I say the image found me? ;-) when using my exchangeable lens cameras (X-Pro2, X-H1, GFX 50R, etc.) … Maybe it’s the increased creativity spawned by the X100V’s limitation to one lens only or its smallness & unobtrusiveness? Whatever. Look at the image below, another example. OK, I do concede this kinda images don’t qualify as artistic masterpieces by any measure, but they do elicit a strong emotion in me, which most of my other, documentary style photography don’t. It’s somehow got something to do with how the X100 series cameras influence my approach to photography: These little cameras make you want to try out new things. Their fixed focal length animates you to experiment with light & shadows, perspective & point of view, rather than fussing around with focal lengths. You start to intensely feel the world around you, rather than just taking pictures of it. The whole experience is similar to the impressionist painting style: Impressionists like Claude Monet, or Pierre-Auguste Renoir are known for their flurried brushstrokes, they paint the scene as if they had only glanced at it for a moment. It’s just a quick, spontaneous “impression”. That spontaneity is also the core attribute that justifies the X100 series’ value for me! Below another surreal motif which captured my fancy. It’s defined by the stark contrast of the puddle’s inky blackness vs. the bright white pillars - looks like the black puddle is “leaking” from those pillars:

Pillar puddle, seen by Fuji X100V with 23mm F/2 @F/8, 1/80 sec, 200 ISO, -1 EV

Fuji’s original X100 launched in Feb 2011. It went on to become a game changer in the world of photography, mainly due to its promise of “A compact take-everywhere-with-you camera with pro-level image quality output”. Despite its undeniable (retro) charm it did however have several quirks and bugs, many of which were subsequently solved by numerous firmware updates. Since then Fuji has also launched several camera upgrades, all of which have since accompanied me for parts of my photographic life, building the aforementioned “kinship” & “personal ties” in my opening “Love” statement: After the initial X100 came the X100S = “second”, X100T = “third”, X100F = “fourth” and now, after 9 years Fuji’s fifth iteration called X100V is here (the Roman numeral “V” indicating the “fifth”)

Below night image benefitted from using the X100V’s tilting rear LCD screen. I could unobtrusively frame the image properly and wait for the right moment before firing the shutter:

Nightly bistro rendezvous, observed by Fuji X100V with 23mm F/2 II @F/2.8, 1/40 sec, 6400 ISO

The X100V is the one, which in my opinion finally fulfils the original X100 model’s promise, due to following 5 major upgrades:

  1. Weather Resistance (provided the lens is protected by a good UV filter attached to the AR-X100 adaptor ring): Finally this gives me the peace of mind to really always have the camera with me & take photos in all conditions (hey, usually that’s when you find the best images!)

  2. Articulating LCD Screen: Finally the LCD screen can be tilted. In combination with the X100V’s fast autofocus this allows me to discreetly & unobtrusively snap quick pictures from the hip while remaining in full control of image composition & lighting (no more guesswork). The slightly lower point of view also results in a more pleasing perspective in people shots. Raise the camera to your eye? People notice immediately & gone is the spontaneity!

  3. Significantly Improved version II Lens: Honestly I was never unhappy with the X100 series’ original 23mm F/2 lens: But it’s definitively no match for the improved 23mm F/2 version II on the X100V! At max. aperture it’s already sharp over the full frame! And there’s no more close focus softness nor weird lens flare patterns around bright highlights

  4. More Intuitive ISO Dial (and user interface in general): This may be a small change technically but it completely transforms the usability, as you can now leave the ISO ring in the lifted (unlocked) position & fluidly change ISO w/o needing to take the camera from your eye!

  5. Beautifully Designed & High Quality Sleek Housing: Ok, so this one don’t really influence your images but the latest iteration of this camera feels so solid & looks so beautiful, especially the silver version - you just can’t put it down anymore & constantly need to take photos … ;-)

There’s one more upgrade which is the slightly higher resolution BSI (Back Side Illuminated) X-Trans IV sensor with 26MP and 160 base ISO vs. the previous 24MP X-Trans III sensor with 200 base ISO. However I can’t really see a big difference here so for me this one don’t really qualify as a substantial upgrade … The new sensor even demonstrates slightly higher noise levels at higher ISO’s, but you really need to look very closely to see the difference, see below example taken at 1600 ISO - still perfectly OK if you ask me:

Grey vase found by Fuji X100V with 23mm F/2 @F/2.8, 1/40 sec, 1600 ISO

Unfortunately there are also 2 “downgrades” compared to the X100F which I’m not so happy about:

1. NO infinity target indicator box in the OVF (Optical ViewFinder) when using “Corrected AF Frame”:

Screenshot 2020-03-22 at 14.57.00.png

This means you lose any indication of where your AF target box will be at distances larger than your current focal position, making AF focussing using the OVF less predictable: No way of knowing to where the AF target box will jump when refocussing from near to far. If you’re at a point A on a map and you don’t know how far away point B is, how’re you supposed to know when you’ve passed 1/3, 1/2 or 2/3 of the distance toward point B? On the X100F the always visible near & far target boxes make it more easier to judge!

2. Missing D-Pad: This is partly mitigated by the ability to use gesture swipes on the rear LCD touch panel

To be fair the X100V’s EVF has a higher resolution compared to the X100F (3.69 mln dots vs. 2.36 mln dots) & it offers a more smooth viewing experience than the EVF on the X100F. Below image was composed by using the EVF (I needed the precise limit of the frame on the right side to exclude a building crane from intruding into the image & I didn’t want to have to crop afterwards … ;-)

Early morning sun on town house façade, Fuji X100V with 23mm F/2 @F/8, 1/680, 320 ISO

OK, so I can live with those lesser downsides. Not to forget there are still 2 big benefits inherent to the X100 series compared to other mirrorless cameras: A super quiet leaf shutter allowing flash sync up to 1/4000 sec shutter speed and a built in (4 stop) ND filter

In overall I gotta say that the above mentioned improvements make the X100V the most significant upgrade of the whole X100 series ever (from my point of view). The X100V finally fulfils the brave promise of Fuji’s original X100: A compact, always with you everywhere camera delivering pro-level image quality. So, how about some images of brick walls to demonstrate that “pro-level image quality”? Sorry, I ain’t a brick wall photographer really. Y’all just gonna have to believe me on that one … the X100V’s new version II lens is phenomenal. Totally rad. Simply awesome! Don’t trust me? No problem, there’s like a million of brick wall photography specialists roaming the net - just head over to them & pixel peep to your heart’s content!

There are some reports on the web about the camera heating up and the manual focus ring making grating noises. While I’ve not experienced the former I did have to exchange my first camera to get one without the grating noise of the manual focus ring …

Summing up I can without any reservations highly recommend the X100V and rate it with ***** (five stars) … It’s ideal for all kinds of documentary & street photography and for social, family and wedding photography I’m sure y’all will have a wonderful & fruitful experience with the X100V. FYI for me the X100V is a “her” coz I got an emotional connection to her & absolutely love shooting with her (her name’s “Irene”, crazy huh? ;-)

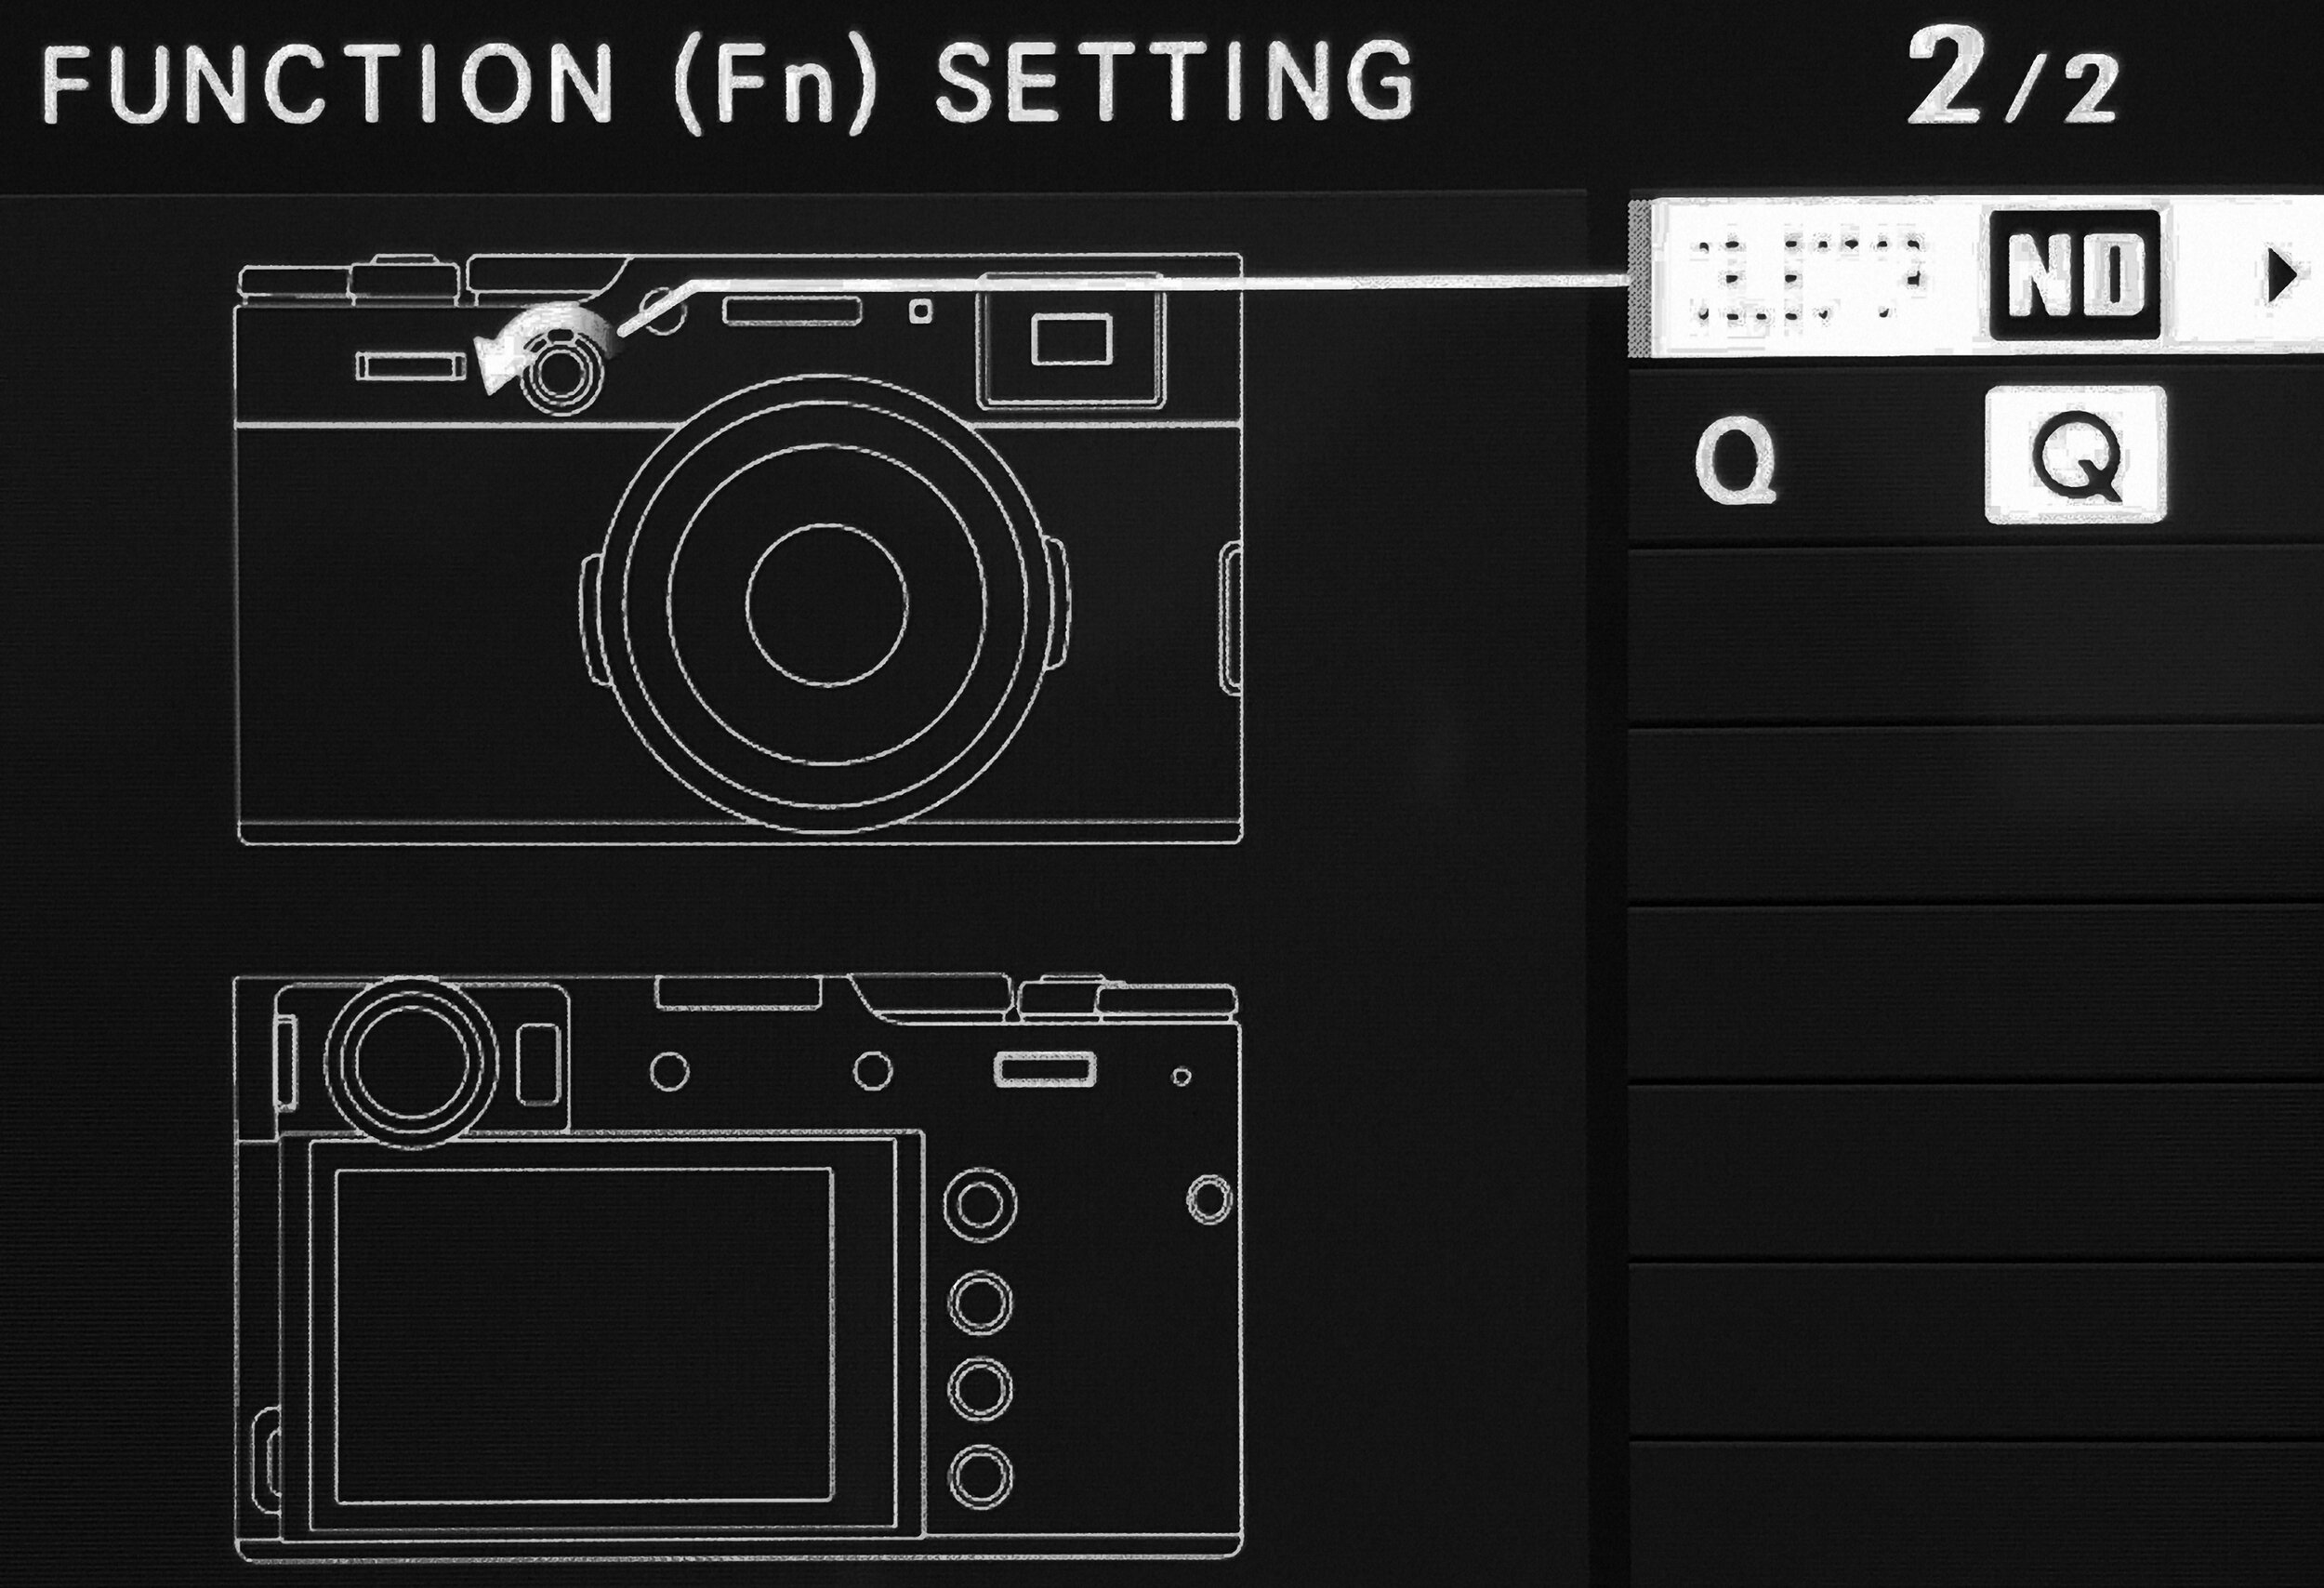
So, before I close this post I’d like to share my preferred personal Fn (function) button allocation with youse (don’t worry, it’s totally for free, kinda like a “bonus”)

These Fn button settings give me a seamless adjustment experience while using the camera, minimising the interference on the image taking process (please excuse the less than perfect image quality of the X100V’s LCD screen off my iPhone, but it’s good enough to see the settings I think):

X100V Fn Allocation 1.jpg
X100V Fn Allocation 2.jpg
  • Fn1 ………… Shutter Type

  • Fn2 ….…….. Face / Eye Detection Setting On/Off

  • T-Fn1 ……… Photometry

  • T-Fn2 …….. ISO Auto Setting

  • T-Fn3 …….. AF Mode

  • T-Fn4 …….. Natural Live View On/Off

  • AELAFL …. AE Lock Only On/Off

  • R-Dial ……. Focus Check (press to Zoom in)

  • Selector … ND Filter (pull to the right & hold for 3 sec to activate)

  • Q …………… Quick Menu

If you have any questions and/or any comments / suggestions please leave me a note in the comments section below or on my “about” page (your email will not be disclosed), I’ll answer every one of your messages!

Many thanks for visiting & reading and hope you enjoyed it! Please take care & stay healthy,

Best regards,

Hendrik

If you like you can support me by sending me a small donation via PayPal.me/hendriximages ! Helps me run this site & keeps the information coming, many thanks in advance!

Format Battle: Fuji APS-C vs. Medium Format

First off I wish all of you a very happy & successful new year! My start into the new year was characterised by going “Full Fuji”: I traded in all my full frame kit (Nikon D850 / Z7) to get a Fuji medium format camera with a couple lenses. This means that next to my APS-C format gear (X-Pro2 / X-H1) for journalistic & documentary work I now also have a larger than full frame camera (GFX 50R) for more thoughtful, higher image quality photography. Really? How much more do you need than the already impressive image quality Fuji’s APS-C sensors provide? And be aware, the larger sensor also introduces several challenges & some disadvantages, to coin a phrase: “It’s one small step in format, but one giant leap in adapting your photography” (compared to full frame). Please read on to find out more!

Vertical shadows play on the wall, X-Pro2 with XF 23mm F/1.4R @F/5.6, 1/2700 sec, 400 ISO

Stepping up from an APS-C X-Pro2 with the XF 27mm F/2.8 R to a medium format GFX 50R with the GF 50mm F/3.5 R LM WR (both rangefinder style mirrorless cameras with their most compact “pancake” lens mounted) is quite a “leap” actually … It will increase your kit size by approx. 15%, the weight by approx. 85% and nearly double your cost (and the lenses will cost approx. 3x of what you’re used to with APS-C … 😅). Woah! To add insult to injury y’all should be aware that to get a similar depth of field on medium format compared to APS-C you’ll need to stop your lens down by nearly 2 (two!) stops more. So a F/5.6 on your X-Pro2 will need a dim F/11 on your GFX. OK, you can partly compensate this by allowing a 1 stop higher ISO (w/o seeing any negative effects), but still. Low light photography w/o tripod becomes a bit of a challenge. The next thing you gonna notice is the different aspect ratio. The above image was taken on my X-Pro2 on 3.2 aspect ratio (quite a “long” format 😉), with the veritable XF 23mm F/1.4 R attached. Based on the relation between length of sensor diagonal and focal length I’d need a 45mm lens on my GFX 50R to achieve the same (diagonal) field of view as with the XF 23mm on my X-Pro2 (both corresponding to a 35mm full frame equivalent field of view)

Now, Fuji is so kind to offer us a GF 45mm F/2.8 R WR which would perfectly fit the bill, but that one’ll set you back by another approx. 1800$ … So on account of that eye-watering price I unfortunately don’t (yet) have such a lens (Jeez, with those kinda prices you don’t just “go out and buy a lens” … 🙃). So, I tried it with my compact GF 50mm F/3.5 R LM WR instead (corresponds to a 40mm full frame equivalent field of view), see the resulting image below:

The same shadow play, on the GFX 50R with the GF 50mm F/3.5 R LM WR @F/11, 1/340 sec, ISO 200

Interesting, even Fuji was telling me the correct medium format lens to compare to the XF 23 would’ve been the GF 45mm, the width of the images appear to be very similar: Compared to the X-Pro2’s APS-C sensor with its quite “long” 😉 3:2 aspect ratio, the GFX 50R’s medium format sensor has a more balanced “shorter” 4:3 aspect ratio. But if you frame to the same width and crop (shorten) the APS-C image to the same aspect ratio as the medium format sensor you get nearly an identical image, see the direct comparison below (OK, the position of the shadow on the right side is shifted between the 2 images, but that’s due to the change in the sun’s position - I took the second image a few minutes later):

X-Pro2 image, now cropped to 4:3 aspect ratio

GFX 50R image, same as above

So how did this all play out? We wrote the year 2016, fall 2016. @Photokina Fujifilm effectively turned the world of photography upside down by launching a larger than full frame “medium format” mirrorless camera system at a significantly lower price point (-30%!), compared to any other medium format competitor. They boldly just overstepped full frame and went straight to medium format, coming from their APS-C format X-series range. Of course I was intrigued! But at that time an 8 grand entry ticket into the medium format game was still too high for me, so instead I went full frame in April 2018 (Nikon D850, see here, here and several posts thereafter …). The definitive advantage of full frame vs. APS-C is the narrower depth of field at comparable aperture, combined with the in general higher max. aperture and less high ISO noise. But in the end I had to concede that the increase in image quality (which in some cases was even not really evident, see here) was too much offset by the significant higher size & weight compared to Fuji’s APS-C offerings. Last but not least I so much prefer Fuji's user interface to the Nikon setup!

So at the end of 2018, when Fuji announced a ‘rangefinder-esque’ version of their medium format sensor camera in form of the GFX 50R at an even lower price point (around 6 grand with the standard lens), I knew I had to get my sweaty hands on one! Weighing less and more compact than my D850 / Z7 and FTZ adapter with comparable lenses at only an approx. 10% higher price? I was sold: The GFX’s medium format files demonstrate an amazing depth, tonality & 3D pop; it has traditional dial based ergonomics (like all Fuji’s); the viewfinder is on the left of the body (rangefinder style) and it has a tilting touch screen allowing discrete photography with the camera at waist level like I did with my Hasselblad C/M long times ago … Hey, what more do you want?

Before continuing the comparison between Fuji’s APS-C and medium format I should clarify that in reality Fuji’s “medium format” is actually a cropped medium format, you could say like a “macro” four thirds ;-) see the comparison of the sensor sizes below:

Sensor size comparison, courtesy of photographylife.com

Moving from APS-C to Fuji’s medium format obviously brings a massive nearly 4x increase of sensor size, whereas you only get an increase of 1.67x vs. full frame. So you could expect that image quality-wize full frame and cropped medium format are roughly comparable and both visibly better than APS-C. But when analysing my test shots I was surprised to discover that there is actually a visible improvement from full frame (Nikon D850 with AF-S 35mm F/1.4) to Fuji medium format (GFX 50R with GF 50mm F3.5)! Check out the crops below:

Crop from APS-C test shot, with X-H1 and XF 23mm F/1.4 @F/2, 1/850 sec, ISO 200

Crop from Full Frame test shot, with Nikon D850 and AF-S 35mm F/1.4 @F/2.8, 1/250 sec, ISO 64

Crop from Fuji medium format test shot, with GFX 50R and GF 50mm F/3.5 @F/3.5, 1/125 sec, ISO 320

Coming back to my original question as to how much additional value this (cropped) medium format brings vs. full frame I think there is no clear cut answer. It depends as always on your priorities & preferences! On the plus side you get fantastic files off Fuji’s medium format sensor (btw the sensor has a Bayer layout, so no demosaicing issues in Lightroom). They sport amazing detail and clarity, with beautiful dynamic range and tonality. Vs. full frame DSLR’s you get the benefit of a hi-quality EVF (electronic viewfinder), and not needing to bother with AF micro adjustment, all at a visible higher image quality level while in a comparable size package vs. full frame (and all that at a very reasonable price!). The compactness of the Fuji GFX 50R, especially if coupled with the smaller lenses (like the aforementioned GF 50mm F/3.5 R LM WR) even allows you to do some street photography (provided you have the time to get the focus right) …

On the down side, If you do chose to go the medium format route (vs. full frame) you need to accept that you will not get the creamy bokeh full frame sensors with large aperture lenses are capable of. Fuji’s medium format lenses, while delivering amazing image quality all just don’t have very large max. apertures. These modest max. apertures mean you already lose approx. 1-2 stops vs. full frame lenses of comparable focal lengths. To this you’ll need to add nearly another stop (vs. full frame) to achieve a comparable depth of field. So be aware you are looking at 2-3 stops less light gathering capability! However, due to the better high ISO performance of the medium format sensor (see also interesting comparison here) you can recover around 1-2 stops by dialling in a higher ISO value. Another challenge is depth of field. When using medium format you have to select your focal plane very carefully as the sharpness fall-off from sharp to unsharp zones is much more pronounced than the smaller formats (no worries with APS-C btw!). Also note that focus speed is quite a bit slower than you were used to on full frame …

With this 1st post of the new year I hope I could give you some food for thought and help y’all in your personal decision process! Please leave me a message in the comments section below or on my ‘about’ page if you have any questions or there’s anything I could help to clarify for you. Many thanks joining the discussion and for visiting! And once more all the best for your photographic new year!

Best regards,

Hendrik

If you like you can support me by sending me a small donation via PayPal.me/hendriximages ! Helps me run this site & keeps the information coming, many thanks in advance!
Where Shadows Fall ... There’s Light, Merry Xmas!

First off, with this post I’d like to wish a merry Xmas to my faithful followers, and to any of youse who’ve visited my site thank you for looking by! Also a special thanks to all of youse who’ve left positive and critical comments here over the last year, by that giving me the opportunity to learn & improve my photography! For today I wanted to share some thoughts on how the fall of shadows manifests the existence of light, and how that’s also a good analogy for life (… a fitting topic for the season, don’t you think?). Anyways if interested please read on!

Deck chairs sparkling in the sun, captured on X-Pro2 with XF18mm F/2 @F/8, 1/150 sec, ISO 200

I discovered the above motif while enjoying a few days vacation with my wife in our beloved Italy (isola d’Elba to be precise): It was early in the morning and the first rays of the sun were just coming over the mountains, lighting up these old deck chairs around our B&B’s pool and casting their first light into the dark shadows with the promise of a lovely day to come. Of course you never know if that day’ll really turn out nice but it don’t harm to think it will & look forward to a great day with a smile on your face regardless! I wanted to animate people looking at my image to always think positive & look eagerly forward to what’s to come … To create that analogy my exposure was based on the bright reflections of the sun on the metal bars, thereby plunging the shadows into deep blackness (i.e. I was actually underexposing by about 1.5 stops vs. a ‘correct’ exposure). Trust Fuji X-Trans! The impressive dynamic range of that sensor ensured I didn’t loose all detail in the dark areas of the image and I could easily recover sufficient detail in post by upping the shadows slider!

Bicycle wheel shadowcast, seen on X-Pro2 with XF18mm F/2 @F/8, 1/550 sec, ISO 200

For me the above image goes the opposite route. Whereas in the deck chairs image the first sunlight was carving details out from the darkness, the shadows in the above image are actually covering them: Look at the pavement - the low angled sun’s rays are revealing every detail of the cobblestones. Only where the shadows of the bicycle’s wheel fall the details are obscured. The life analogy to this is for me that there are some dark sides to every situation. Be aware of them but don’t stress too much over them and especially don’t let them spoil your day! So in this image I actually over exposed a bit and then used the highlight slider in post to bring detail back into the highlights. Of course that works best in RAW but being an old (Fuji ACROS-R) JPEG aficionado I found that Fuji’s JPEG’s have sufficient dynamic range to pull that stunt off!

White sofa in the afternoon sun, discovered with X-H1 and XF23mm F/1.4 @F/5.6, 1/550 sec, ISO 200

Finally, in the above image I was confronted with quite an extreme contrast but wanted to still see details in the shadows and the highlights. So I exposed for average grey (ignoring that my histogram was freaking out on both sides) and hoped that my JPEG’s dynamic range would still cover it (knowing that I’d still have the RAW file to save my a** if it wouldn’t have been enough 😉). Luckily it was still OK (barely) and I could recover some detail in the darkest shadows and brightest highlights by maxing out Lightroom’s shadow and highlight sliders. So it’s the JPEG you see here, actually quite amazing! As I’d already said many times I just love Fuji JPEG’s in combination with the ACROS-R film simulation because of that simulation’s tonality dependent grain effect, which is very similar to what I was used to in the old days when using film (remember Tri-X? Man the images shot on that film had such beautiful grain!)

OK, with that I’d like to wish y’all a very merry Xmas (crazy how fast time’s flies, it was ‘just’ Xmas yesterday and now it’s the 25th again 🙃!) … and of course I wish youse a great start into the new year - may your photographic (and other 😉) dreams all come true and may you have all health, fun and success in 2020!

If you got any questions, or wish me to cover a specific topic in one of my next posts, please leave me a message in the comments section below or on my ‘about’ page - your email will not be disclosed & I promise to answer every single message! Thanks so much for visiting and wish y’all a wonderful holiday season,

Best regards,

Hendrik

If you like you can support me by sending me a small donation via PayPal.me/hendriximages ! Helps me run this site & keeps the information coming, many thanks in advance!
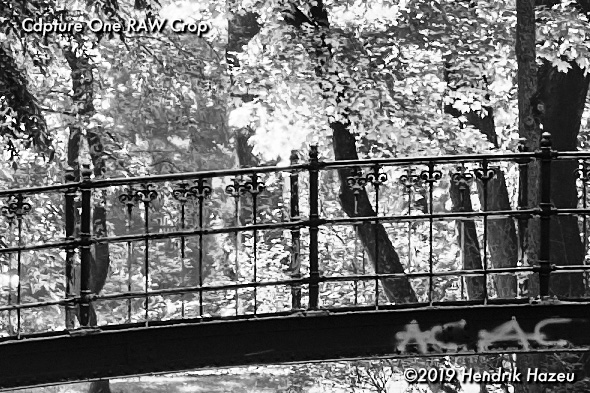
3 Reasons Why the X-Pro3 ... is NOT for Me!

So I’ll spare y’all the trouble & cut right to the chase: After playing a bit with Fuji’s newest creation (borrowed from an early adopter photographer friend), I came up with 3 reasons why the new X-Pro Three is NOT for me:

  1. The weird “hidden” LCD, in combination with

  2. The “forgotten” D-pad, and last but not least

  3. The “crippled” OVF (Optical View Finder)

If youse are interested in my uninfluenced & unbiased opinion, please read on! In case you’re intrigued by all the hype around the new X-Pro3 and contemplating getting one, I hope this will help you to decide for y’self before spending your hard earned cash on something you may regret … For starters see below an image taken with my trusted and beloved X-Pro2 (who’s real happy it ain’t gonna be replaced anytime soon ;-)

Bikes in contre jour, captured on X-Pro2, with XF 18mm F/2 @F/4, 1/2700 sec, ISO 200, -1EV

Now before I get “shot down” by the Fuji fan-boys out there who can’t handle anyone disagreeing with what “their” brand is doing and/or need to justify their own purchase decision, please hear this disclaimer: This is my website where I share my opinion, whether you like it or not. Why? Coz I can. I ain’t no “X-Photographer”, nor a “Fuji Influencer”, and also no “Brand Ambassador”, who all seem to feel obliged to follow their master’s voice: Repeating marketing mumbo jumbo ad nauseam in the hope of animating people to buy an in my opinion flawed concept … Having said that I do have to say I commend Fuji for having the guts to try something new in a somewhat saturated market and bringing out a highly controversial & polarising proposition. Refreshing. And not at all mainstream. No sir. But just a step too for far for my liking! Missing the for me most important attribute of a camera of getting outta the way of my creative photographic process. My X-Pro2, X-H1 and GFX50R all have that capability. The X-Pro3 don’t. Sorry. With their whole range Fuji up to now aspired to create serious photographic tools, but this one undoubtedly has been born outta a more ‘hipster’ kinda philosophy!

Let’s dive a bit more into the 3 initially mentioned reasons: Fujifilm’s first strike is the weird “hidden” LCD screen, where the usually visible LCD screen is replaced by a digitally simulated film box tab harking back to yesteryear’s analogue photography equipment. Maybe a fun feature for a couple minutes but then decidedly becoming an annoying gimmick. Annoying because if I want to review my image I gotta fumble with the camera to first fold out that LCD screen which then awkwardly sticks out exposed from the camera at a weird angle, getting me more worried about breaking it off. Hey, I’d prefer to have the main feature (image review on LCD) immediately accessible without having to fold anything out, rather than seeing this weird film tab / exposure settings display, which don’t really add any value to my photographic process

See, the main innovation of the digital age over the analogue era (which I grew up with) was the ability to instantly review your image (if needed), rather than sweating it out until your developed films came back from the lab a week later. This “immediate review” capability had a significant positive impact on accelerating my photographic learning process as I could improve the composition & exposure in real time & on location rather than trying to fix it in the darkroom afterwards, especially with fast changing subjects / lighting situations like in the below image with 4 walking girls backlit by the late afternoon sun:

Walk into the light, with XF 35mm F/2 on X-Pro2 @F/8, 1/320 sec, ISO 200

So Fujifilm wants to change the way we take photographs … all that talk about the X-Pro3’s “hidden” LCD on their website, making the photographer concentrate more on his image & somehow magically enabling a more “pure, raw photography” (whatever that’s supposed to mean … ?). For me this seems more like a case of “if you can’t fix it feature it”. Well, y’all can be sure I ain’t gonna let nobody prescribe to me if, when or how often I look at my display! Seriously, if you really think you need a hidden LCD to stop you checking and/or adjusting your image to become a better photographer and you think a traditional LCD’s the reason why you never liked your images, then I guess you you got a real problem & don’t really have a clue what you’re doin’ … One more small remark on the sideline: The X-Pro3’s ingenious hidden/folding LCD collides with my quick release plate when using a tripod, so I could only fold it out to 90° (nearly broke it too then) …

But then Fujifilm’s second strike is an even more strange design choice, completely incomprehensible in my view in conjunction with the “hidden” LCD: They went along and simply “forgot” the D-Pad. Gone. Missing. Deleted. WTF? Ok, so my GFX50R also ain’t got no D-Pad, but there I can at least use the touch screen LCD to access my 4 most used functions (Face/eye Detection Setting, AF-Mode, ISO and Photometry). But on the X-Pro3? Sorry. No joy … oh yeah, coz that one’s LCD is usually hidden! Great. Did you forget? Well, the fan boys & ambassadors got all the answers: “… at first I missed the D-Pad, but then I got used to it, coz it gives me a more ‘pure’ photography experience …”. Sure, you can use the menu button and the joystick to surf the menu’s in the electronic viewfinder, but that completely disrupts the photographic process IMO. I just needed 2 fluid motions on my X-Pro2’s D-Pad to change the AF-Mode for the image below:

Sun reflecting in contre jour façade, seen by X-Pro2, with XF 35mm F/2 @F/8, 1/950 sec, ISO 400, -1EV

Last but not least Fujifilm’s third strike is the X-Pro3’s “crippled” direct vision optical viewfinder (OVF). In my opinion this is a significant evolutionary step back from my X-Pro2. Crippled? Yeah, well it don’t change its magnification any more when using different focal lengths. Instead of the X-Pro2’s 0.36x and 0.6x magnifications which switch, depending on which lens you attach to the camera, the X-Pro3 compromizes on only one fixed 0.52x magnification, optimised for the 23mm focal length. This compromize means I couldn't really judge the framing in the OVF when using my beloved XF 18mm F/2 anymore (especially losing the ability of seeing what’s going on outside the frame - ideal for street photography). On the other hand the frames in the OVF became too small when using my XF 35mm F/1.4 or XF 56mm F/1.2 that I can’t really use them for careful portrait compositions anymore either. Although the X-Pro3’s viewfinder image is larger than the X-Pro2’s it don’t help if it can’t be used properly with certain focal lengths - those of youse who prefer shooting with 16 or 18mm wide angles using the OVF will probably be frustrated with the decision to limit the magnifications. Apart from that the infinity indicators are now also missing, meaning you lose any indication of where your AF point will be at distances larger than your current focal position - so, no way of predicting were the AF-frame will jump when refocussing from near to far. Even the X-Pro3’s electronic viewfinder (EVF) having a larger resolution & refresh rate, it’s limited OVF options make the the hybrid viewfinder lose some of its appeal. For the below image I needed to use the EVF to keep the sun just outside of the frame:

Bus stop in contre jour, discovered by X-H1 and XF 14mm F/2.8 @F/8, 1/120 sec, ISO 200

Well, I needed to get that out. Don’t get me wrong, I’m sure there will be many out there who will love the Fuji X-Pro3’s controversial design and I wish them all the best & lots of fun with it. Originally the X-Pro line was intended for wedding & professional photographers, however in my view there’s nothing professional about the above mentioned drawbacks & limitations. So I get the impression that here overhyped marketing and an army of “ambassadors”, maintaining that only the X-Pro3 enables the user to experience “raw, pure photography” are being used to influence people to purchase an in my opinion flawed concept. So I hope that presenting my differentiated view will help to counter a bit of the marketing hype around this camera

You don’t agree? No Problem, go out and be happy with your X-Pro3, I wish you all the best! You don’t know? Then I strongly advise you to try the camera out carefully before you hit the buy button, to see if you can live with its quirks. You agree? Then you are also one of those for whom the camera should get out of the way of your creative photographic process. Whatever, I’d love if you’d share your opinion in the comments section below. Looking forward to a lively discussion!

One final thought - I hope the guys over at Fuji are reading this: PLEASE Fuji don’t repeat the “hidden” LCD thing on the upcoming successor of the X100F (X100V)! Give us an updated 23mm F/2 lens, weather sealing and a normal tilting touch screen LCD, that would be THE street photographer’s dream! Hey, we then could even live without a D-Pad (it’s ok on my GFX50R too …)

Wish y’all good shooting & a very nice Sunday!

Best regards,

Hendrik

If you like you can support me by sending me a small donation via PayPal.me/hendriximages ! Helps me run this site & keeps the information coming, many thanks in advance!

Sailing Away? A Desert Island Kit!

Planning on getting stranded on a desert island? I say “planning” coz ya normally don’t “plan” to get stranded & therefore ain’t gonna be able to prepare for it, unless you got your “desert island kit” on you like 24/7/365 … and FYI “desert” don’t mean that island’ll be arid & dry (as in a Sahara-like desert), in this context “desert” is an archaic form of the adjective “deserted” (meaning devoid of people, uninhabited). Furthermore, the phrase “desert island” isn’t a recent invention derived from some ghetto slang, it’s been in the English language since around 1200 A.D.! With all that outta the way please read on to find out what’s IMO the best Desert Island Kit!

Schooner bowsprit in contre-jour morning light, X-Pro2 & XF 18mm F/2 @F/8, 1/125 sec, ISO 200, +0.7 EV

Coming back on the “planning” bit … If I’d have to move to a desert(ed) island & could only take ONE camera & ONE lens with me, it’d be my X-Pro2 with my beloved XF 18mm F/2 stuck on it (provided I’d have a solar powered battery charger to go with it - no ‘lectricity > no photography with that one!): Anyway the XF 18mm’s ideal for any & all kind of documentary photography: Wide enough to show y’all the environment but not too wide (just) to not distort people in the image. That’s of course only in case somebody else unexpectedly turns up on your deserted island 😉!

Schooner mast and rigging just before dawn, X-Pro2 & XF 18mm F/2 @F/8, 1/60 sec, ISO 200

So, if only one lens, why then take a camera where you can exchange the lens? Well, maybe I’d encounter a camera store on that desert island and then I’d get myself an XF 35mm F/2, to photograph those people which were gonna turn up unexpectedly! And while I’m in that store I´d get m’self a second X-Pro2 to prevent having to change lenses too often with all that dust blowing around on my island (see, I’m paranoid about changing lenses since changing over to digital 😰). So there you have it: My “desert island” kit would be two X-Pro2’s, one with an XF 18mm F/2 R and the other with an XF 35mm F/2 R WR - fits easily in a small shoulder bag (dimensions - around 6” x 5” x 4”, like the Hama Monterey 130)!

Tugboat’s & dinghy’s stern (= rear end ;-) … X-Pro2 & XF 18mm F/2 @F/8, 1/100 sec, ISO 200, -0.7 EV

As you can see in the above image, the XF 18mm has an amazing depth. Especially when using it in portrait format, here the rather long 3:2 aspect ratio of the APS-C format stretches the image from near to far. Due to the greater depth of field of the smaller format everything’s in focus already at F/8!

Hope this post has given you some inspiration and will animate you to go out and take images with an unobtrusive high quality kit fitting in a small bag. A desert island kit, with which you won’t really miss anything!

If you have any questions, please put them in the comments section below or leave me a note on my “about” page. Look forward to the discussion!

Wish y’all good shooting & a very nice Sunday!

Best regards,

Hendrik

If you like you can support me by sending me a small donation via PayPal.me/hendriximages ! Helps me run this site & keeps the information coming, many thanks in advance!

Square Affair - with the X-Pro2!

Originally wanted to title this post “It’s Hip to Be Square”, like the refrain in the 1986 song “Hip to Be Square” by the American rock group Huey Lewis and the News … but it wouldna been appropriate. Any of youse know why? In that song the singer’s saying he’s starting to conform to the establishment coz he can’t stand the stress of being a rebel no more: i.e. it’s Hip (= cool, fashionable) to be Square (= conformist, following the rules). In photography most images have a rectangular aspect ratio (3:2 or 4:3). Using a square image frame (1:1) is therefore relatively rare, so you actually gotta be a bit of a rebel & break outta the rules if you wanna “go square” 😉!

Lantern and its shadow, seen with X-H1 and XF 90mm F/2 @F/8, 1/210 sec, ISO 400

Since 2010 Instagram has enjoyed a great success as online image sharing platform - until August 2015 only square images were allowed, driving somewhat of a renaissance of the square format: As Instagram is mainly viewed on smartphones, using a square image format means you aren’t required to turn your phone sideways for landscape images, allowing for a more ”smooth” user experience…

But the square format was there long before Instagram came along: Around 1930 first professional larger square format cameras appeared (Rolleiflex, Voigtländer and Hasselblad to name a few), using a reflex mirror to project the image onto a matte glass plate which could be viewed from above. This image was upright but laterally reversed. So if the camera would’ve had a rectangular image format it would have needed to be turned onto its side for portrait images, which would then have resulted in an upside-down viewfinder image! To prevent this inconvenience the manufacturers of the time stuck with a square image format

Interestingly enough there does not really seem to be much older history of the square format, eg. dating back to the times where images were still painted (at least I couldn’t find anything …)

Anyway, with the advent of the digital age came a greater flexibility regarding image aspect ratios, allowing the photographer to choose already in camera or afterwards in post production from a plethora of image formats from 16:9 to 1:1

You can apply the square format during image capture (obviously this works only for JPEG´s - the RAW image always uses the full native format of the camera) or in post production. I usually prefer to decide that when developing the image in Capture One Pro - some images only lend themselves to the square format at a second (or third) glance!

Original image, with 1:1 square crop

For example, take a look at my first image of this post. I only saw the potential for a tighter square image format when preparing it for uploading to my blog (inspiring me to create this post “Square Affair” on the square image format 😉) On the picture with the blue square frame you can see how it looked originally: Cropping it to a square shape has left out unimportant parts of the image, focusing on the main elements, lines and shadows. I imagine this has just always been a square image just waiting to be discovered! What do you think?

So, what’s behind all this “square” talk? Basically the main quality of this frame is that it creates a natural sense of balance, stability & symmetry. None of the sides is favored, preventing any distraction from the image content. The square composition allows you to eliminate negative space & superfluous elements in your image - excessive space in an image invites a viewer’s eye to wander away from the subject & makes your subject look a bit lost. The square has an inherent classic & beautiful design, which if carefully applied will make your images stand out from the crowd! Because the square lacks any horizontal or vertical bias the viewer’s eye tends to be guided in a circular motion, often converging towards the centre of the image

Wall with shadow of another lantern, captured on X-H1 with XF 90mm F/2 @F/8, 1/600 sec, ISO 400

In the above image I could leave out the right side of the rectangular frame because the shadow of the lamp already tells the story - don’t need to have the lamp itself inside the frame no more 😉)

Original image with 1:1 square crop

See here the original framing on the image with the blue square frame. In this case I was not really happy with my initial picture - should’ve gone a bit closer to leave out the white strip on the lower edge of the frame … I learnt from this that you gotta “work” the image more - instead of just one or two frames per subject it would be better to try out different perspectives, distances & framings, giving you more material to work with and increase the chance of getting that perfect image!

As you can see in the image with the lamp below the square format also circumvents the otherwise ubiquitous “rule of the thirds”: The square frame gives you more freedom to place the central element of interest - usually a slightly off-centre position of the main subject is enough to create sufficient tension in the composition!

Lantern surrounded by canvas roof, discovered with X-H1 and XF 16mm F/1.4 @F/5.6, 1/5 sec, ISO 400

Here you can see another example: The original image is nice, but includes too much empty (= “negative”) space on the left and right sides. Cropping it to a square focuses on the essential part of the image: The steps with their diagonal lines and railings. As you can see, the content of the left & right borders does not really add anything to the image & I think you will agree that the square image is much more powerful: The square frame gives the image a much more dynamic & interesting look!

Original image with 1:1 square crop

In this case I have to admit that I was planning to put this image into a square frame all along. By the way, using the full rectangular native image format and later extracting a square crop during post processing allows you to place your square off centre to create a different perspective. This can help if you are photographing a reflecting house façade or window directly from the front and want to prevent seeing your reflection in the image: You place the square all the way to one side of the rectangle, resulting in your reflection not being visible anymore!

Steps in a square frame, seen with my X-Pro2 with XF35mm F/2 @F/8, 1/180 sec, ISO 200

Now before y’all gettin’ too excited here, there’s just one caveat: When shooting square you gotta be aware (WOW, that rhymes ;-) that shooting in the square format reduces your lens’s effective angle of view. The angle of view of a lens determines how much of the image you can cover and is calculated according following formula: 𝜶 = 2arctan(d/2𝑓), where 𝜶 (alpha) is the lens’s diagonal angle of view in degrees, d represents the length of the image’s diagonal in mm (28.23mm for the uncropped Fuji APS-C sensor) and 𝑓 is the focal length of your lens in mm. For those of youse not so much into math here’s the thing: Cropping your native 3:2 aspect ratio image to a square 1:1 aspect ratio generates a field of view (FOV) which makes your lens look like the next longer lens in your system. For example Fuji’s XF 18mm / 28mm Full Frame equivalent FOV behaves like the XF 23mm / 35mm Full Frame equivalent FOV lens, the XF 23mm / 35mm Full Frame equivalent FOV like the XF 35mm / 53mm Full Frame equivalent FOV, and so on - basically you can multiply your focal length by a factor of appox. 1.2 when going square! See the below image, taken with the XF 16mm, it looks more like an image taken with the 18mm:

Dinner out with best friends, image taken on X-H1 with XF 16mm F/1.4 @F/2, 1/40 sec, ISO 2500, +0.7 EV

So I hope I’ve managed to inspire youse to experiment a bit with the beautiful, serene and classic square format, and hope you’ll “dare to be square” (again a rhyme 😉). Please share your experiences in the comments section below or leave me a note on my “about” page. Look forward to the discussion!

PS: The best thing about going square is: It don’t cost you nothin’, jeez - this accessory is completely FREE 😊!

Peace with y’all and wish a very nice weekend

Cheers,

Hendrik

If you like you can support me by sending me a small donation via PayPal.me/hendriximages ! Helps me run this site & keeps the information coming, many thanks in advance!

Fuji's 18mm F/2 - Better Than You Think!

I was quite pleasantly surprised about the amount of feedback & questions I got to my recent review of Fuji’s XF 18mm F/2R. Seems a lot of youse are quite interested in this little lens, despite the negative image it has on the net. So I thought it would be a good idea to share some more (real) images taken with it & maybe convince the one or other of you to try it out for yo’self ;-) Please read on if interested & thanks in advance for visiting and joining the discussion!

3 tables in the sun, seen with X-Pro2 and XF 18mm F/2 @F/2.8, 1/1700sec, 200 ISO

What I like about the above image is that even I’m using a wide angle lens I can limit the sharpness to quite a narrow zone, at F/2.8 nearly everything is blurred except the ashtray on the first table! Combined with letting the shadows drown into inky blackness this guides & focusses the viewer’s eye into the image! For me the 18mm (28mm equivalent field of view on full frame) is an ideal lens for documentary photography - wide enough to bring you close to the action but not too wide to distort too much or become too intrusive

But is it any good at close focus distances? For example fuji’s XF 23mm F/2R WR is plagued by soft rendering at close focus distances when using larger apertures … For documentary photography excellent short distance performance at larger apertures is key! Well, I can say that I ain’t got no reservations about my XF18mm. Sharp as a tack at close distances, already from max. aperture mine is. So, do I got a magic copy? Don’t think so - these things are manufactured according relatively tight tolerances, look at what optical limits had to say about it: “The center quality is very good at F/2 and the borders are also fine but the corners are very soft at this setting …”. I can confirm, take a look at below image, taken at max. aperture F/2. Not bad, eh? Look at the details in the bicycle wheel hub (it was less than 1m from the camera)!

Anywayz for documentary photography the extreme corners are not relevant. But of course, if you happen to specialize in brick wall or test chart photography, you may not agree. Anyhow I do think most of those “review specialists” flaming this lens on the net belong to that category of “photographers” …

Bicycle wheel, captured on my Fuji X-Pro2 with XF18mm F/2R (28mm FF equiv.) @F/2, 1/1250 sec, ISO 200

To put all this into perspective I took some comparative images on my Nikon Z7 (has a 47MP full frame sensor!) with the - in my opinion - best wide angle lens out there, the Nikon AF-S 28mm F/1.4E ED. Well I gotta say that I was shocked that I didn't see no major difference … The little Fuji wide angle is just. That. Good! OK the depth of field is of course narrower on the full frame lens but I gotta concede that the XF 18 for sure ain’t no slouch compared to below full frame image taken with the Nikkor stopped down to F/2, no sir:

The same bicycle wheel, on my Nikon Z7, with the veritable AF-S 28mm F/1.4 @F/2, 1/1000 sec, ISO 64

For all youse “pixel peepers” out there, please take a look at below crops! I shamefully have to admit I didn’t expect this. You really gotta hand it to Fuji: Quite an amazing performance!

Crop from the Fuji XF 18mm F/2 @F/2

Crop from the Nikkor AF-S 28mm F/1.4 @F/2

And the XF18mm at max. aperture is already so good that stopping it down to F/5.6 don’t really make a huge difference, please see comparison below:

Again the crop from the Fuji XF 18mm F/2 @F/2

… the XF 18mm F/2 stopped down to F/5.6

Before getting too excited, d’you wanna see what that little bit more full frame sharpness, dynamic range and shallower depth of field’s gonna cost you? You better sit down now, coz y’all gonna get really shocked! See below, I kid you not: The Nikon Z7 / FTZ / AF-S 28mm combo weighs and costs approx 2.3 times as much (in words: two point three !) as the Fuji X-Pro / XF 18mm combo (not even mentioning the size difference). Jeezus …

Nikon Z7+FTZ+AF-S 28mm F/1.4E ED = 1.4 Kg / 5250€ vs. Fuji X-Pro2+XF18mm F/2 = 615g / 2300€

Apart from that, showing up with that Nikon kit is gonna have people seriously divin’ for cover, thinking you’re planing on starting world war III ;-) At “cross-coffee-table” distances of around 1-1.2m that thing really sticks into your subject’s face (with a 77mm dia filter to boot). Good luck in getting your model eased up … Compared to that people don’t even really notice the Fuji (even the X-Pro2 ain’t really minimalistic either, but the lens is!)

Concluding & to be honest, I’d have a have a real hard time justifying the full frame kit over the Fuji. Hope you people out there learn from this & do it better than me ;-) Right, the full frame bazooka’s nominally better but you gonna need it maybe like 5% cases, if at all … Don’t worry I love my Nikon kit. Great camera & stellar lens, but not sure if I’d invest in those again!

Hope this little “real world” comparison will help some of youse to decide for yo’self what’s the best deal for your personal photographic requirements! Please let me know / leave me a comment below or on my “about” page, thanks as always for visiting & for your support!

Many thanks & best regards,

Hendrik

If you like you can support me by sending me a small donation via PayPal.me/hendriximages ! Helps me run this site & keeps the information coming, many thanks in advance!

LOL ... Lines of Light, the X-Pro2 Rediscovered!

LOL … “Laughing out Loud” in internet speak, but now it seems to have worn off & they ain’t sure no more what it stands for … So I thought I’d advocate a new meaning for it: How ‘bout LOL = “Lines of Light”. Amazing! For sure this is gonna “go viral” now ;-) … Let’s see, please read on to find out why!

Lines of Light, seen with X-Pro2 and XF35 mm F/1.4R @F/8, 1/550 sec, ISO 200

Lines of Light, seen with X-Pro2 and XF35 mm F/1.4R @F/8, 1/550 sec, ISO 200

Hang on … X-Pro2? Didn't he flame that one in this post some time ago? Claustrophobic narrow viewfinder, camera too large, etc.? Yeah, but somehow I seem to keep coming back to the rangefinder-esque style of the X-Pro. Maybe the combination of an optical and electronic viewfinder, like on my X100F - with the possibility to see “outside the frame”? Or the left-sided position of the viewfinder allowing you to view the world thru both eyes and not hiding your face behind the camera, thereby creating a more intimate atmosphere with your subject in people photography? … Possibly. For me however, the main reason must be the X-Pro2’s sensor and its wonderful rendering, just like on my X-H1! Look at the image below - you just gotta love the transparency of the sun’s rays streaming thru the last remnants of morning fog, drawing parallel lines to the trees’ shadows on the ground!

Sun’s rays thru the fog follow the shadows, X-Pro2 with XF18 mm F/2 @F/8, 1/14 sec, ISO 200, +1 EV

This was a RAW image developed in Capture One, unbeatable if it’s about recovering details from outta those inky shadows. As most of youse know I only do RAW development on a few difficult hi-contrast images. Otherwize I mostly stick to JPEG´s which I slightly tweak in Lightroom (Curves & Levels), where the X-Pro2´s X-Trans III sensor and Fuji’s ACROS simulation with its beautiful tonality dependent grain engine create wonderful film-like JPEG’s! I guess another reason I’m sticking with the X-Pro2 now is my worry that its successor slated to come out end of this year may have a more aggressive JPEG processing pipeline, like I recently discovered on Fuji’s X-E3 (halos around small details even with JPEG sharpening turned all the way down). Any such future development would make it difficult for me to continue my beloved ACROS-R & JPEG based workflow!

3 steps to heaven, X-Pro2 with XF35 mm F/1.4 @F/8, 1/180 sec, ISO 200

Also above image is dominated by a pattern of diagonal lines. On this one I had to use the X-Pro2’s EVF (electronic viewfinder) to find the exact position from where all the elements didn’t interfere which each other!

I hope y’all liked the post & enjoyed spending some time here, thanks for visiting & please leave me your thoughts in the comment section below (or on my about page). Many thanks & wish you great photographic opportunities for the next week! Best regards,

Hendrik

If you like you can support me by sending me a small donation via PayPal.me/hendriximages ! Helps me run this site & keeps the information coming, many thanks in advance!

Shadow Seeker

Looking up “sunseeker” in google results in more than 7 million hits - products ranging from luxury yachts to bikinis. Now try the same with “shadowseeker". This gets you only slightly over 50k measly hits, less than 1% of the former - and then most of those are related to the shady world of pc gaming … Strange. Seems that the word “shadows” has a kinda negative connotation, while “sun” elicits a more positive association in people. Not so in photography. Here it’s the shadows which make or break the image, please read on if interested!

Sun’s reflections illuminate the dark background façade: X-H1 with XF35mm F/1.4, @F/8, 1/200 sec, ISO 200

Like in the image above: The sun’s reflections from windows across the courtyard cast the only light onto the dark shadows on the façade in the background, giving the image an interesting accent and balance vs. the bright graffitis on the wall in the foreground (of course I had to help a bit with curves & levels ;-). The long rays of the low evening sun sculpt out each texture on the building’s surfaces they skim by, painting long shadows after each protrusion. It’s the resulting shadows which tell the story. Without them the image would be flat & lifeless!

A few steps right: Long, low shadows uncover every detail, X-H1 with XF35mm F/1.4, @F/8, 1/125 sec, ISO 200

That’s why I like to see myself as a “Shadow Seeker”, always on the look-out for those non-substantial areas of darkness which manifest the existence of light! It’s only a few minutes before the sun sets that you get to capture such images, but then there are unlimited opportunities within a few steps of each other. See the image above, taken from a few steps to the right! Or the one below, where the lantern outside the frame is manifested only by its shadow:

Shadows bring to light the lantern that wasn’t there: X-H1 with XF35mm F/1.4, @F/5.6, 1/400 sec, ISO 200

Those of youse who’ve had the patience to follow my ramblings up to here may be asking themselves why I always keep using Fuji´s XF35mm F/1.4R lens. Because its got magic inside! This lens finds the images most people would oversee, long enough to focus on the essential part of the image but not to short to include too much into the frame! It’s the ideal lens for finding patterns and carving out details out of the bigger picture. Properly applied it helps you to select the important part of the scene, focusing your view on the essential message!

Also here a pattern of shadows makes the image: X-H1 with XF35mm F/1.4, @F/8, 1/500 sec, ISO 200

I was attracted to the above scene because of the pattern of shadows on the white wall - again an example of shadows creating an image which normally wouldn’t have been there …

For your information: All images in this post were developed using Capture One Pro 12. I´ll be happy to share my favorite settings & work-flow in a future post, please leave me a message on my “about” page or in the comments section below if you’re interested!

I hope this post was inspiring to you, animating you to go out and search for the shadows, which show you that light exists. Wish you great images and a good Sunday evening. All the best, your

Hendrik

If you like you can support me by sending me a small donation via PayPal.me/hendriximages ! Helps me run this site & keeps the information coming, many thanks in advance!

Fuji RAW Worms - Has Adobe Finally Nailed It?

Got worms? Then you must be photographing in RAW with Fuji cameras and gotten suckered into a life-long relationship with Adobe’s Creative Cloud subscription model (just like me ;-) Don’t worry, you ain’t gotta take no nasty medicine anymore to get rid of them worms, coz I got good news for ya! Please read on if interested and join the discussion below in the comments …

The Hof Garden in Bayreuth, captured on Fuji X-H1 with XF 56mm F/1.2 @F/8 1/20sec ISO 200, ACROS-R JPEG

Adobe seems to have gotten their act together!? Finally … So, you may not need to get a divorce & ditch that subscription after all (they probably ain’t gonna let no-one escape anyway … ;-) Anyways, at the end of the day Photoshop and Lightroom are still the global standard when it comes down to pro digital asset management & post processing

But before discussing the cure let’s first understand the problem (for those of youse new to Fuji or contemplating joining the Fuji family). Simply put digital sensors are comprised of millions of photo sites (“pixels”) which measure the amount of light (number of photons) hitting them. To allow the camera to see the world in color the sensor is overlaid by a color filter array (CFA) of red, green and blue color filters in a distinctive repetitive arrangement, allowing the camera software to recompile the light levels into color information. This reconstructing of the full color information from the individual pixels is called “Demosaicing”. Obviously the demosaicing algorithm needs to match the arrangement of the color filters, otherwize you will not get the image you saw thru the viewfinder …

Color Filter Arrays used in digital camera sensors:
Fuji vs. the rest of the world (note the green “X” ;-)

All makers of digital cameras use a so-called “Bayer” color filter arrangement (repeating a 2 by 2 pixel pattern of 2 green, 1 red and 1 blue filters). Hang on, ALL makers of digital cameras? No. Fuji has implemented a different arrangement of color filters, repeating an alternating 3 by 3 pixel pattern of 5 green, 2 red and 2 blue filters, they call “X-Trans” (the “X” referring to the X-formed arrangement of the green photo sites)

Fuji claims this “X-Trans” arrangement delivers a more “film-like” rendering due to the less regular pattern and better performance than the Bayer arrangement, especially improving the micro-contrast due to the higher percentage of green pixels (55% vs. 50%). See here for more information. Demosaicing software optimized for the Bayer CFA layout (as used in Adobe’s Camera RAW converter at the heart of Lightroom & Photoshop CC) can cause trouble when applied to the X-Trans CFA layout, especially with small repetitive patterns, like foliage & brick structures

Now here’s the thing: I think that Fuji’s proprietary CFA layout is not even fully managed by their own in-camera demosaicing algorithm (albeit becoming visible only at more extreme magnifications). When you enlarge the below in-camera converted JPEG to a magnification corresponding to an approx. 20x30 inch / A1 size enlargement you can start to actually see the “worms”:

Fuji’s in camera JPEG conversion’s got worms!

Fuji’s in camera JPEG conversion’s got worms!

At mural sized prints (as I do for exhibitions) you will see these painterly, wormy artefacts (see the bridge railing and the mushy area in the upper left quadrant of the above image- there should have been some branches visible there)! Don’t get me wrong - you’ll probably never have any problem with images prepared for web viewing or normal sized enlargements, using printers up to 13”x19” / A3+ size when viewing them at normal viewing distance. But for big enlargements using JPEG’s is no option anymore. For anything above 12”x17” / A3 size you gotta go RAW. Unfortunately Adobe’s Camera Raw converter don’t do much better either, see the image below - in my opinion not much different compared to the in-camera JPEG conversion:

Adobe Camera RAW’s conversion also got worms!

Adobe Camera RAW’s conversion also got worms!

You can see the vertical rods of the railing are partly obscured by foliage and the branches in the upper left quadrant are still not visible. Not good, I’m afraid this even happens with the sharpening settings optimized for X-Trans (low “amount” & high “detail”)! So, what to do? Apart from using external RAW converters known to work satisfactorily with the X-Trans sensor layout, like Iridient or RAW Therapee there is for me only one bit of software which has a good X-Trans demosaicing performance, while combining RAW conversion and image management (I really don’t like having to split my workflow over separate bits of software …): Capture One Pro. Let’s see how that fares:

Capture One Pro. Less “wormy” but a little bit too harsh for my fancy …

Capture One Pro. Less “wormy” but a little bit too harsh for my fancy …

From my point of view it’s better - the vertical rods of the railing are now barely visible and you can see a hint of the branches in the upper left quadrant, but the it does look somewhat harsh now (also here I used my preferred settings but left out the grain to be comparable to the other images). To be fair I’ve happily been using Capture One for a while now as my preferred “heavy duty” solution for large printing (A3+ & larger). But I gotta say I’m not completely happy with Capture One’s user interface - maybe that’s because I mainly use Fuji’s in-camera converted JPEGs (for around 90% of my work) and am therefore used to Lightroom’s interface & workflow. Using Lightroom and Capture One in parallel means that I also need to maintain 2 separate catalogues and processed image folders on my MacBook Pro. So, when Adobe released their new “Enhance Details” feature end February this I was naturally intrigued & curious if it would do better with X-Trans images! See below the result, straight outta Lightroom, using Enhance Details (this creates a DNG in the same catalogue as a new “digital negative” which can be further processed in Lightroom just like a RAW file):

Adobe Camera Raw’s new Enhance Details feature

Adobe Camera Raw’s new Enhance Details feature

In my opinion this is far better than the previous examples, the bridge railing and the foliage have a more natural look. And you can now see the branches in the upper left quadrant (directly below the words “Enhance Details” ;-)! For my workflow this means I can process my ACROS JPEG’s as usual and apply Enhance Details with subsequent RAW development of the DNG file for those images earmarked for big enlargement / fine-art printing. Finally Adobe seems to have listened to us Fuji photographers, the results achievable with the “Enhance Details” feature are impressive! There’s only two caveats: 1. Enhance Details needs a lot of computing power (30-40 sec on a reasonably fast 2016 MacBook Pro), so those of youse with older machines might need to go out for lunch while batch processing the results of your latest photo-shoot … ;-) 2. the Enhance Details adds a DNG file to your drive for each processed image which is approx. 50% larger (around 150MB) than an average Fuji RAW file, eating up your disk space at an alarming rate!

Here the same image as before, developed by ACR Enhance Details into a DNG and processed to taste in Lightroom:

The same image developed from the Fuji RAW file, using Adobe ACR´s Enhance Details feature!

Another example with many small details in the grass & foliage:

Contre-jour image of trees in Bayreuth’s Hof Garden, captured on XF 56mm F/1.2 R @F/5.6, 1/140 sec, 400 ISO

I hope this post was interesting for you & y’all could get something from it for your own photography. Enjoy your Sunday & wish you all the best for your photographic endeavours,

Many thanks for visiting, please leave me a comment below if you have any questions or feedback, best regards

Hendrik

If you like you can support me by sending me a small donation via PayPal.me/hendriximages ! Helps me run this site & keeps the information coming, many thanks in advance!

JPEG's ... A Fool's Paradise?

I LOVE Fuji's JPEG’s. Unconditionally. On one of my recent Blog posts praising (again ;-) the qualities of Fuji ACROS JPEG’s, someone commented: “RAW is the answer. Only a fool relies on the severely limited JPEG’s”. So I thought I might take a closer look at my Fool’s paradise ;-) and compare one of those beloved ACROS JPEG’s to the RAW version processed in Capture One Pro 12. Please read on if interested …

A sunlit façade in Bayreuth’s town centre, Fuji X-H1 with XF 56mm f/1.2 @f/8, ACROS-R JPEG processed in LR

It was 0730 hrs when I came across this façade illuminated by the first rays of the morning sun, giving it a glowing, nearly transparent look. After some shuffling & jostling around to find the best perspective (ya gotta be fast, coz the light changes fast at this time of the day ;-) I captured the image on my X-H1 in RAW+ACROS-R JPEG with +0.7 EV compensation. Normally Fuji’s ACROS JPEG’s are just amazing - a little curves and levels adjustments in Lightroom and you ‘re good to go. Instant art. Great images in no time!

However, when I pulled this image into Lightroom it kinda didn’t replicate the scene as I’d visualized it during capture. Everybody knows RAW files got more latitude, so I thought I’d try “fool” around a bit in Capture One Pro 12 and see if I could get closer to my original vision of the scene: A sunlit façade with that delicate, transparent look! See the result below:

The same façade, now as RAW processed in Capture One Pro 12. More as I’d originally visualized it!

What’s different here is that I could keep the light tones of the façade lighter than on the JPEG by flattening the highlight shoulder of the tone curve. This resulted in a greater separation to the dark foreground, giving the image that transparent look. Another key factor supporting this is the possibility to selectively darken the sky on the top left by reducing sensitivity in the Cyan and Blue channels and darkening the roof by reducing sensitivity in the red channel in Capture One’s Black & White tool (without affecting the tonality of the other colors). Try covering up the sky portion with your hand and you’ll see what I mean! No sir, this don’t work on the JPEG, but it does take quite a bit of time to get there. Below you can see 100% crops of the JPEG and RAW images side-by-side:

ACROS-R JPEG - more contrast & tonal seperation!

RAW work-out in Capture One Pro - transparent!

So you gotta choose: Either fast and good (JPEG) or slow and better (RAW ;-) … Which one d’you you like better? Yeah, many try to replicate their JPEG’s with the RAW files, but I think that defeats the purpose, each approach has its merits. As for me, I do like both, each image has its own distinct character - the ACROS JPEG with more tonal contrast, but having experienced the real scene the more subtle RAW image more closely represents my original impression of lightness & transparency!

Please let me know your thoughts in the comments section below or leave me a private message in my “About” page. Peace be with you & wish y’all a wonderful Easter celebration! Thanks for visiting & reading, best regards

Hendrik

I hope this post was helpful / interesting for you - If you like you can support me by sending me a small donation via PayPal.me/hendriximages ! Helps me run this site & keeps the information coming, many thanks in advance!

Revisiting Italy and Fuji´s XF 18 mm F/2 R

Of all the many places I’ve had the luck to be, one has captured a special spot in my heart: Italy. The light, the people, the climate. It is just such a special combination! Went there again end of march with my beloved wife and … My new Fujinon XF 18 mm f/2 R. Most reviewers on the net have a so-so to downright bad opinion of this little lens (some even say it’s Fuji’s worst …). That intrigued me - I likes to swim against the current and I’d always loved the 28 mm field of view on my full frame cameras. So I decided to get one & try it. Regardless. Please read on if you are interested in my experience with this lovely little gem!

Cà Palazzo Malvasia, a lovely BnB near Sasso Marconi. View from our terrace with X-H1 & XF 18 mm @f/5.6

We´d booked a night at a Bed & Breakfast near Sasso Marconi (close to Bologna): Cà Palazzo Malvasia. The first surprize came even before arriving: We got a friendly welcome message from the staff inquiring our ETA and informing us how to get there - never had that happen before! Then on arrival we were just completely floored by how beautiful the place is, renovated with so much care & attention. Way better than it had looked on booking.com! And Victoria, the charming lady at the reception took great care of us and made our stay truly unforgettable! Quindi, Victoria se per caso leggessi questo: Grazie mille per un soggiorno meraviglioso. ci ritorneremo! So, if any of you happen to travel the Bologna area (check this out), here’s a wonderful & relaxing place to stay. Highly recommended!

Ok, so what about that little Fujinon XF 18 mm f/2 R now? Check out the below image … Don’t you think it has a wonderful “organic” (whatever that means … ;-) look to it?

Cà Palazzo Malvasia, carefully renovated in “lo stile dell’epoca”. Taken with X-H1 & XF 18 mm @f/5.6, 1/20 sec

As mentioned before so many out there seem to hate this lens coz of its apparently mediocre image quality. So what! I prefer to see things for myself & make up my own mind. Not just parrot what others say. Point is, Fuji’s little 18mm is for me a lens with “character”, because it’s not “perfect”. And that’s why I like it (those of you who know me know I have a soft spot for lenses with character ;-). And it’s extremely compact & unobtrusive - the smallest Fuji lens still having an aperture ring (IMO a necessity). The plants in the image of our terrace below didn’t even realize they were in the image!

This was our terrace in Cà Palazzo Malvasia from which the first image was taken: Fuji X-H1 & XF 18 mm @f/8

But how’s it perform? Now I don’t usually photograph brick walls blown up to 1000 pixel peepin’ percent, so those of youse interested in that sort of thing might wanna look elsewhere on the net. I prefer to take pictures of real world, 3 dimensional people and things and I gotta say I was impressed by the results this little lens delivers. They got a kinda “magic glow”, as you can see in the image below:

The interior of Cà Palazzo Malvasia is decorated with heart! Fuji X-H1 with XF 18 mm @f/5.6, 1/9 sec

Overall I found the sharpness to be very good, especially in the central zone. Easily comparable to my X100F’s 23 mm f/2, even surpassing it at closer subject distances & larger apertures. Please note that the above image was taken at 1/9th (one ninth!) of a second. Hand held! No, I’m not “steady as a rock” ;-) Just got helped out a bit by my X-H1’s image stabilization! Those of you interested in technical details please check out Fuji’s specs here and Imaging Resources’s excellent review here. However, I gotta say this lens ain’t no good for photographing brick walls or flat subjects, coz it does suffer a bit from some softness and purple fringing in the image corners, which still linger on, even if you stop it down a bit. Maybe that’s where all the negative reviews came from: Many of those so-called “reviewers” photographing brick walls & test charts … and freakin’ out about the corners … ;-)

Cà Palazzo Malvasia - a lounge like a private living room, captured with Fuji X-H1 & XF 18 mm @f/5.6, 1/30 sec

I really love the way this lens renders, it’s still a kinda “Old School” design not yet exhibiting the clinical rendering of modern “digital” lenses. Like a sculptor’s tool, carving shapes & tones out of light and shadows. Simply poetic …

However, there’s no light without shadows - a couple things about this lens I’m not so enthusiastic about:

  • The aperture ring: Definitively not a hallmark feat of engineering. Rather stiff and with imprecise tactile feedback on the 1/3 f-stop positions, it’s difficult to adjust intuitively. Feels a bit like a crude prototype crafted by a journeyman in his first apprentice’s year. Meanwhile Fuji has greatly improved the adjustment and feel of aperture rings on their newer lenses

  • The autofocus noise: This lens makes no secret of the fact that it’s focussing (still has a traditional DC AF motor with gears moving all the lens elements around). Luckily it’s only audible in completely quiet environments and the AF operation is reasonably fast (especially with the latest camera firmware installed). My pretty wife must’ve thought there was a mouse in the room ;-)

My pretty wife in our nicely decorated room in Cà Palazzo Malvasia: Fuji X-H1 with XF 18 mm @f/4, 1/15 sec

Ok meanwhile the jury’s back - here’s the conclusion on Fuji’s XF 18mm f/2 R:

Pro’s:

  • Compact and lightweight but well made. With this lens on a smaller body you don’t really have any excuse to not always take your camera with you (and not miss any photographic opportunity anymore)!

  • Unobtrusive, combined with a 28mm (full frame equivalent) moderate wide angle field of view. It’s ideal for immersive street photography - ‘pulling’ you into the action, provided you have the guts to take those 2 steps closer (remember Robert Capa? “If your pictures aren't good enough, you weren't close enough!” )

  • Excellent centre zone sharpness, already from max. aperture onwards. “Organic”, three dimensional image rendering, with lovely bokeh in out of focus areas. This lens is predestined for storytelling & environmental, documentary style work. Also this lens has low chromatic aberration and distortion (corrected by firmware), making it ideal for environmental portraits (1/2 body images in landscape orientation)

  • Good image quality at max. aperture also at closer focussing distances (less than 1m), images taken in low light are perfectly usable and are rendered with great tonality & nice contrast

  • Quite fast and accurate focussing (with newest camera firmware)

Con’s:

  • Price: At 600$ not really a bargain!

  • Some softness and purple fringing in the image corners, improves at f/2.8 but not completely eliminated when stopping further down. Therefore less useful for architecture & landscapes

  • Stiff aperture ring with imprecise click positions

  • Autofocus operation audible in quiet environments

  • Not WR (weather resistant), but never had problems with it even in light rain

Stylish shadow details on our terrace at Cà Palazzo Malvasia: Seen with Fuji X-H1 & XF 35 mm f/1.4 @f/8

Summing up, this lens is great for those:

  1. In love with the 28 mm (full frame equivalent) moderate wide angle field of view

  2. Preferring a compact, unobtrusive prime lens with larger max. aperture than a zoom

  3. Focussing on storytelling & documentary style people / environmental photography

For all others it’s probably better to get a compact zoom which has the 18 mm focal length included, eg. the XF 18-55mm f/2.8-4 R LM OIS

I hope I could offer you some interesting information, ideas and advice for your own photographic aspirations! As always your appreciation, comments & constructive critique are most welcome - please leave me a note in the comments section below or at my “about” page. Wish y’all a great Sunday and may you find the best light!

Many thanks for visiting & all the best,

Hendrik

I hope this post was helpful / interesting for you - If you like you can support me by sending me a small donation via PayPal.me/hendriximages ! Helps me run this site & keeps the information coming, many thanks in advance!