
Always got her with me! No, not my wife … I meant “Irene” my X100V, coz she fits in my jacket pocket (my wife doesn’t - barely … ;-)! I just follow Irene around and capture the images that beckoned her: Fleeting moments in time where the black paint cutout of shadows revealed the objects creating them. Only to disappear forever a few moments later … Enjoy!
Contre Jour City Park Fence, captured by Irene, my X100V with its 23mm F/2 II @F/8, 1/80 sec, ISO 1000
“The best camera is the one that’s with you” - well quoted by Chase Jarvis, creative storyteller (that he was referring to the ubiquitous iPhone don’t matter, the Fuji X100V is ‘nearly’ as compact as the average “smart” phone ;-)
Point is, all that ‘spensive, fancy photography kit ain’t gonna help you, if you don’t lug it around with you everywhere, every day, all day (and all night for good measure). All that gear sitting on it’s shelf at home: y’all just gonna miss all those special, once-in-a-lifetime photo moments which usually tend to happen when you’re least expecting them …
So, advise youse to sell all your gear & get y’selves an X100V. It’s liberating, I kid you not! This is a real camera specialising on photography, not a phone which by the way also snaps some photos now and then (next to a dozen other things: Jack of all trades, master of none …). The X100V’s just on the limit of what I’d consider a compact, always with you camera and the images you’ll take with it’ll blow you over! Look at the image above with the sun backlighting a fence in our city park: finest gradations of grey tones in the highlights and shadows with just barely enough details slipping into inky blacks. The shafts of sunlight connecting the fence with its shadow - amazing! See the tables turned in the image below: Stark contrast in the highlights, but the dark shadows gradated with a lovely tonality:
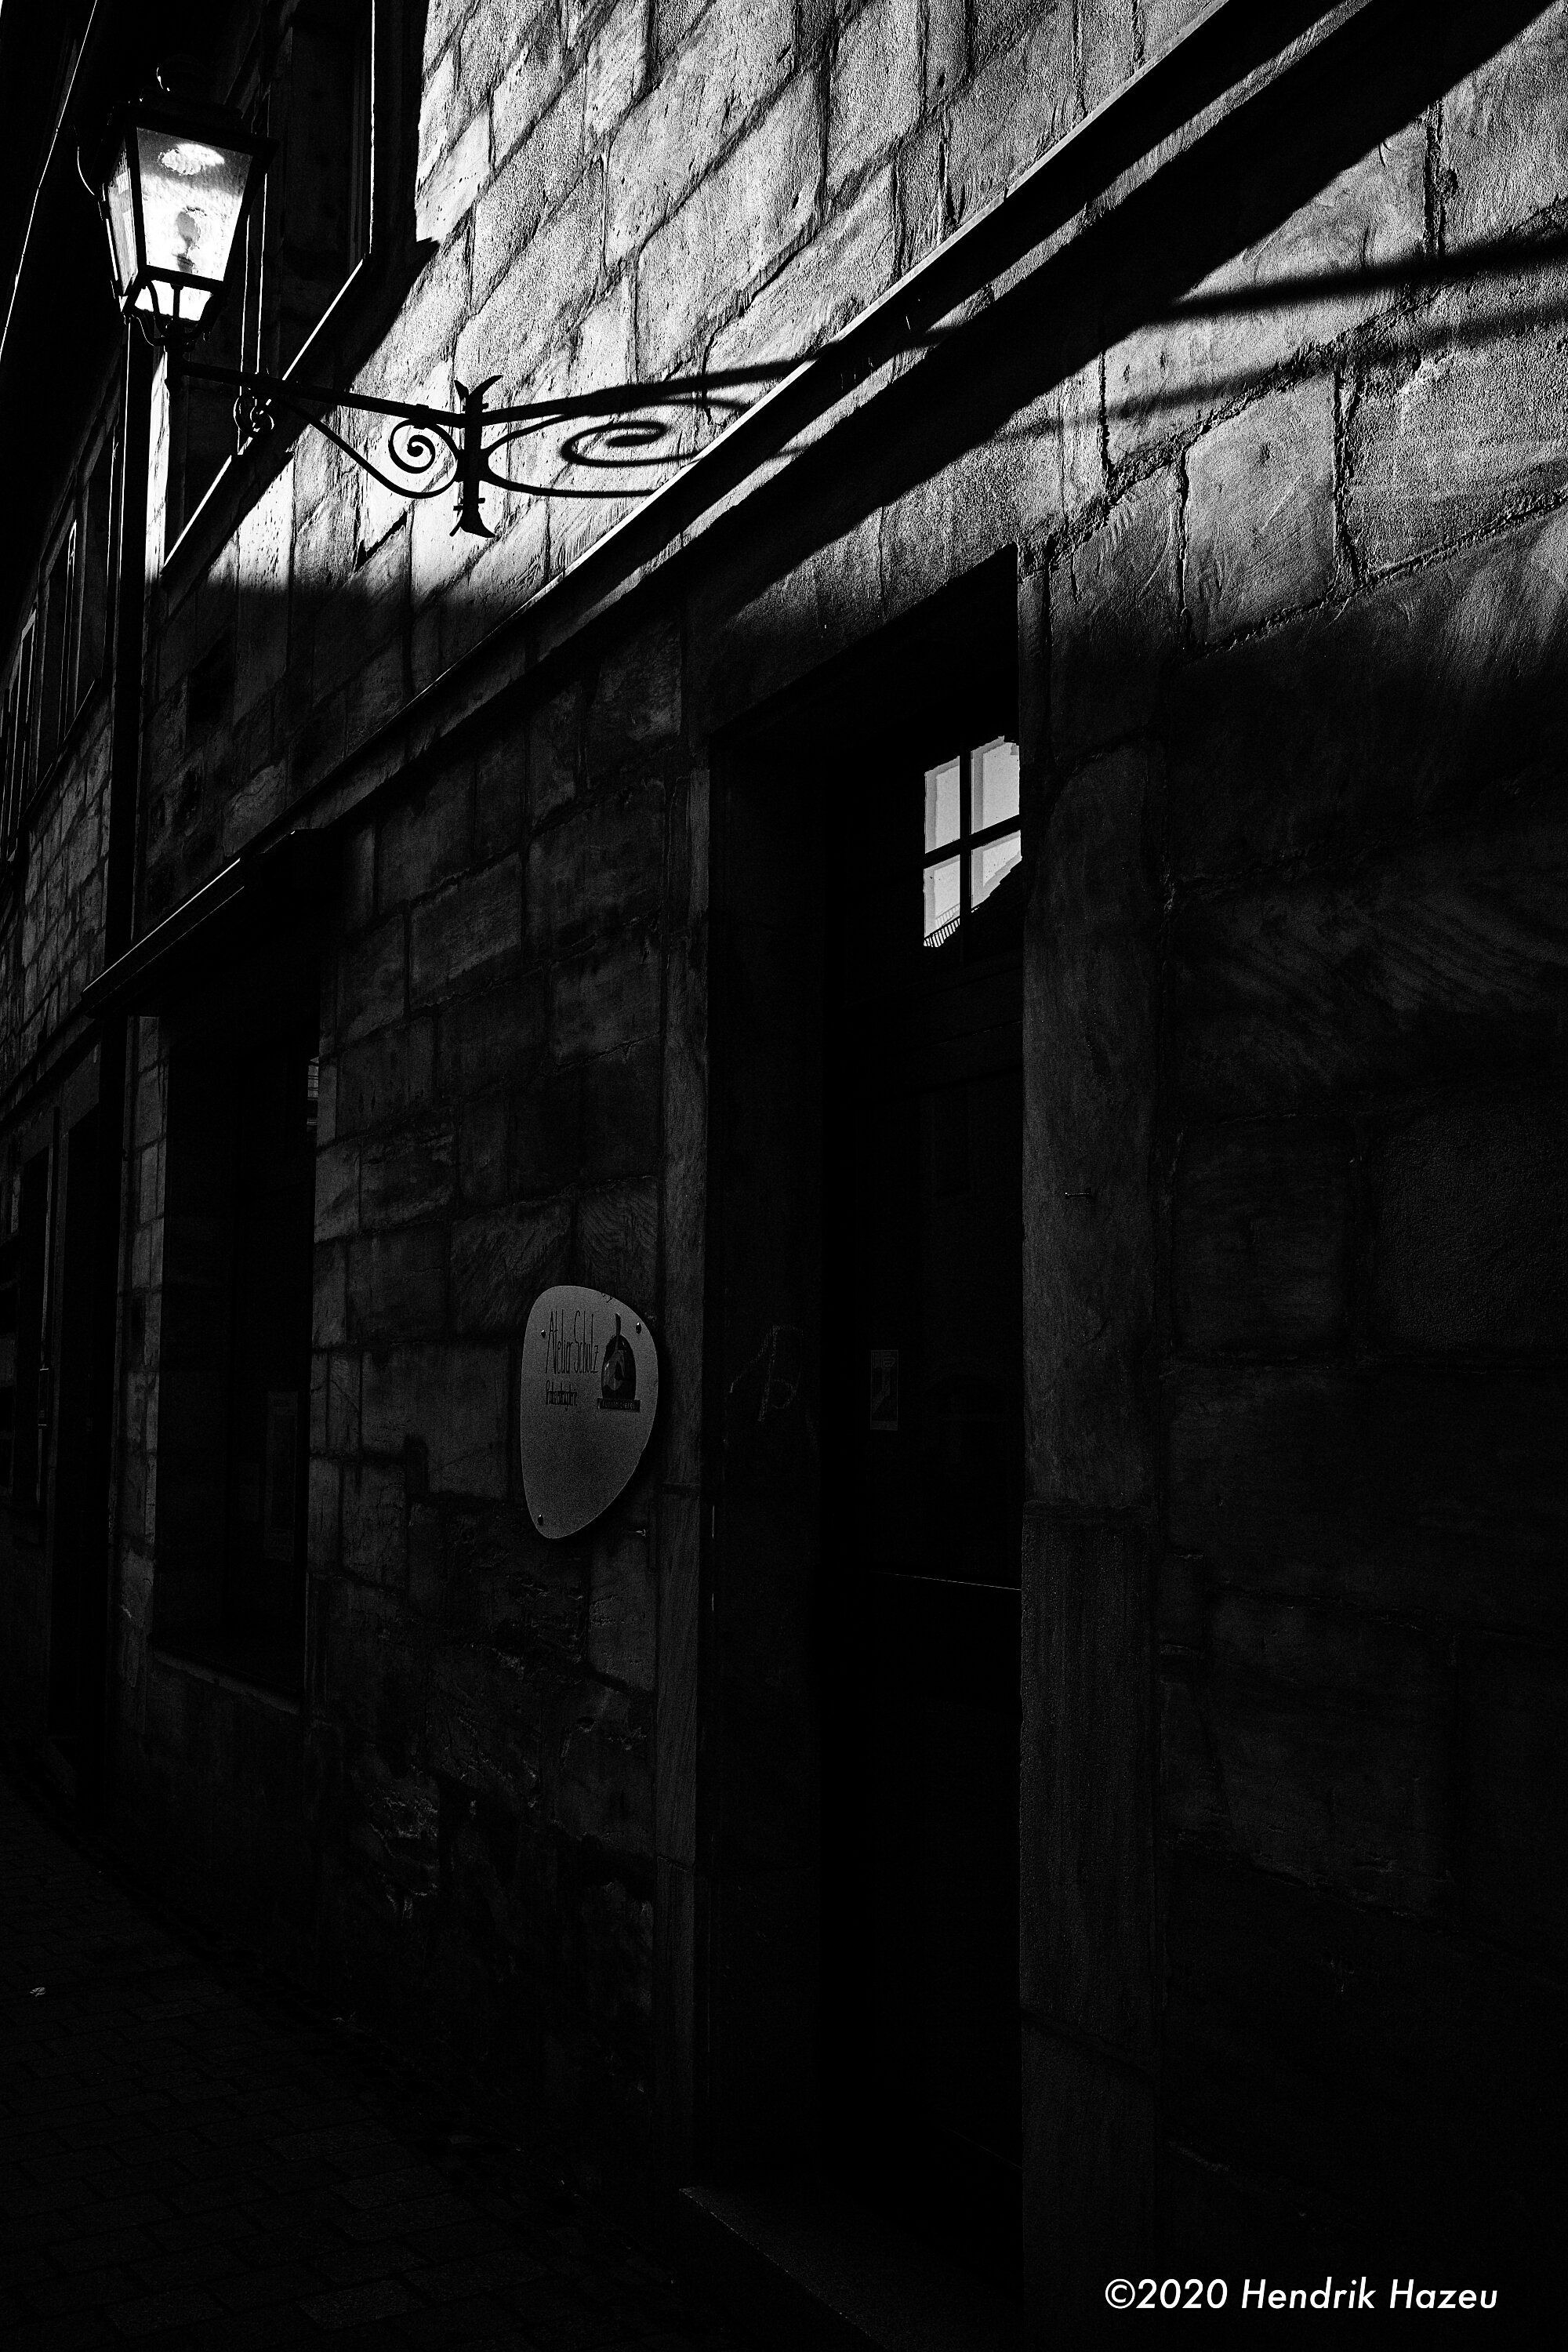
Dark Alley with Sunlit Lamp, taken by Irene, my X100V with its 23mm F/2 II @F/8, 1/180 sec, ISO 320, -1.7 EV
Achieved this by exposing for the shadows (with -1 2/3 EV exposure compensation) & allowing the highlights to burn out a wee bit! The X100V’s hybrid viewfinder is a great help here: I use the optical mode (optical viewfinder OVF) for street photography, coz it allows me to see the scene unfold in real time, w/o blackout at the moment of capture and the environment of the image visible outside the frame-lines. For static motifs (architecture, landscapes) I prefer the electronic mode (electronic viewfinder EVF), as this allows me to see the image in black & white and in the right exposure, contrast & tonality - WYSISWYG (what you see is what you get). This was also important for the below image “Shadow Bike”. I wanted to show that the bike’s shadow is just a virtual, short-lived rendering of the real thing by allowing enough details of the wall’s texture to shine thru the shadows, giving them the appropriate transparent, evanescent character …
Shadow Bike, seen by Irene, my X100V with TCL-X100 II 33mm F/2 @F/5.6, 1/640 sec, ISO 320
Of course you can take such images with any camera, even with an iPhone … But it’s the right combination of size / weight / image quality and a viewfinder which helps you to have the camera always with you, to identify and capture such image opportunities in the first place. I believe Fuji’s X100V is probably the best suited solution out there: Fantastic image quality in a package just small enough to always have with you, with a highly flexible and intuitive viewfinder system. No, the X100V don’t replace an extensive kit offering a wide range of specialised applications, it will more importantly complement your kit by enabling you to capture amazing images any time and place. Surprising and unexpected images, which will be close to your heart, because you weren’t planning them!
I hope y’all got some inspiration here to now go out and take some creative and amazing images, giving you enjoyment & satisfaction - especially important in these difficult times. Let me know your thoughts in the comments section below please, or leave me a note on my about page, take care and stay safe - wish y’all a great weekend, best regards,
Hendrik
If you like you can support me by sending me a small donation via PayPal.me/hendriximages ! Helps me run this site & keeps the information coming, many thanks in advance!